Content Management System
Here we cover how various types of content published on your platform can be managed, including publishing, editing, deleting etc.
When we refer to content management we are usually referring to content published by the platform/owner, distinct from end users content.
Overview
A content management system provides the ability to manage the content, such as web pages, blog posts, navigation items for you website or application.
As an administrator or content editor you may be asked to modify content directly on the site. This is a straight forward process similar to editing word processing documents in most cases.
Note
We are progressively phasing out 'CMS Pages' within the admin portal, and instead moving over to 'Content Items'. Content Items can do all of the things that CMS Pages can, however have a much nicer editor.
Topics
| Topic | Description |
|---|---|
| Managing Content | Overview of content management system. |
| Pages | Management of web pages. |
| Blog / News / Article Publishing | Management of blog posts, new posts or articles. |
| Beautiful Rich Text Editor | Overview of how to perform commonly requested tasks using the Rich Text Editor |
| Downloadable Resources | Management of content that has downloadable components like PDF files. |
| Navigation Menus | Overview of how to change Navigation Menu items that appear at the top of the site, in the footer and various other places depending on the theme design. |
| Legacy CMS Pages Module | Overview of how to manage content managed using the legacy and being phased out 'CMS Pages' module. Distinct from the 'Managing Content' approach mentioned above. |
| Blocks | As an admin, be able to manage content of the pages sections in Admin Panel. |
| Contact Form | As an admin you can see contact forms submitted by users and how they were processed. |
| Frequently Asked Questions | Overview of how to manage Frequently Asked Questions (FAQ) which have their own subsection in the admin where they can be managed. |
Manage the Sitemap and Robots text files |
Generally you should not need to touch these. |
Use Cases
As a platform admin you may need to:
- add new page, edit a blog post, or remove content without filing support tickets.
- update the navigation menu
- update frequently added questions
All these basic operations and more can easily be performed by you in the admin portal.
Related documentation
Depending on what you are trying to do documentation for the feature is split into the following roles.
- As a developer (restricted)
- As a superuser (restricted)
- As a site administrator (this page)
- As an end user
Managing Content
CNXION has a flexible content publishing system. This content can be all sorts of Content Types.
Manage Site Content
Manage pages, blog posts and content items.
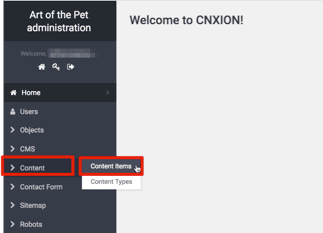
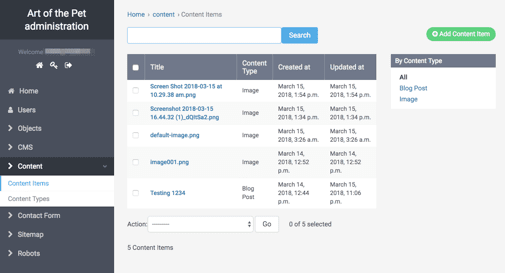
You will find all content items listed by navigating to: Content > Content items
Here you will be presented with a list of published content.
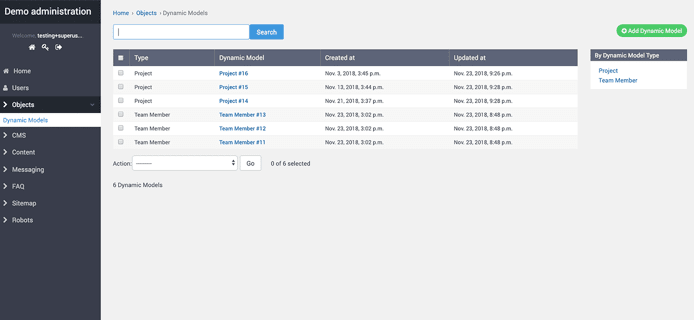
Manage User Content
Manage user created content in dynamic models
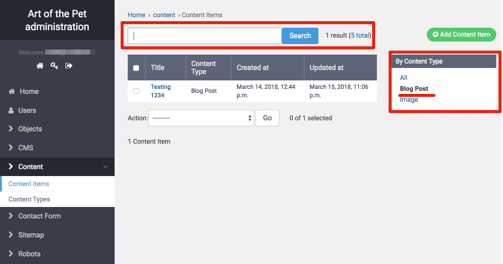
Filtering Content by Type & Searching
You can filter all possible Content Types, by selecting just the type of content you are interested in on the right hand side. If there is a particular item you are looking to edit, you can use the search field to find it.
Standard Content Item Templates
Including pages, publications, blogs and downloadable resources.
Note
Please contact support for assistance, documentation to be updated.
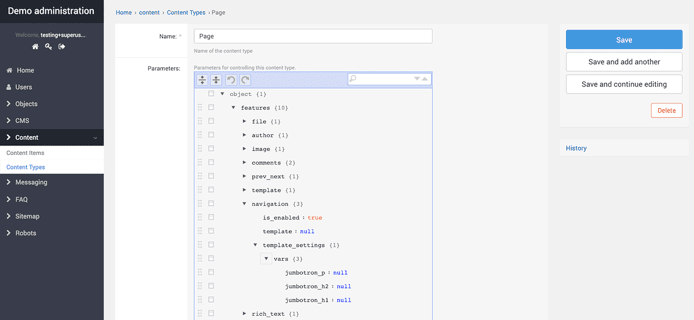
Advanced Template Customisation
Advanced ability to customise sections of standard templates.
Note
Please contact support for assistance, documentation to be updated.
Metadata
Metadata can be added using the Metadata content item for pages that are dynamically generated by the system, such as the home page at / or the Frequently Asked Questions page at faq.

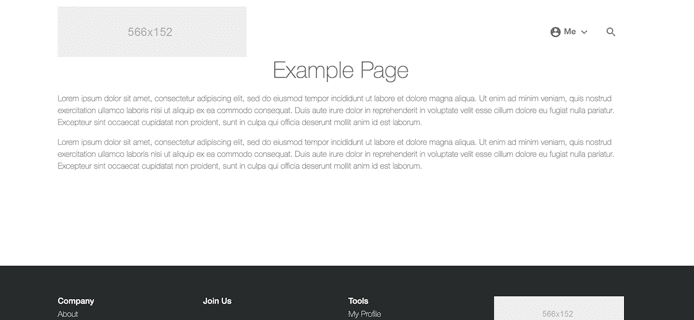
Pages
Here we will limit the discussion to management of Page Type content. A Page is typically used to create a web page that you wish to make publically available. The Page Content type typically has:
- Title
- Rich Text field
- Feature Image
- Metadata
Some examples of pages are:
- Terms & Conditions
- Privacy Policy
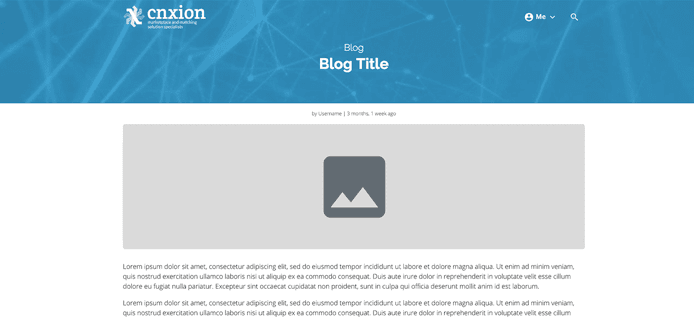
Blog / News / Article Publishing
Here we will limit the discussion to management of Blog Type content. A blog post could also be used for Articles, or News items. The Blog Content type typically has:
- Title
- Rich Text field - That is a text field with formatting
- Feature Image
- Metadata
Creating a Post
Creating a new post is easy:
-
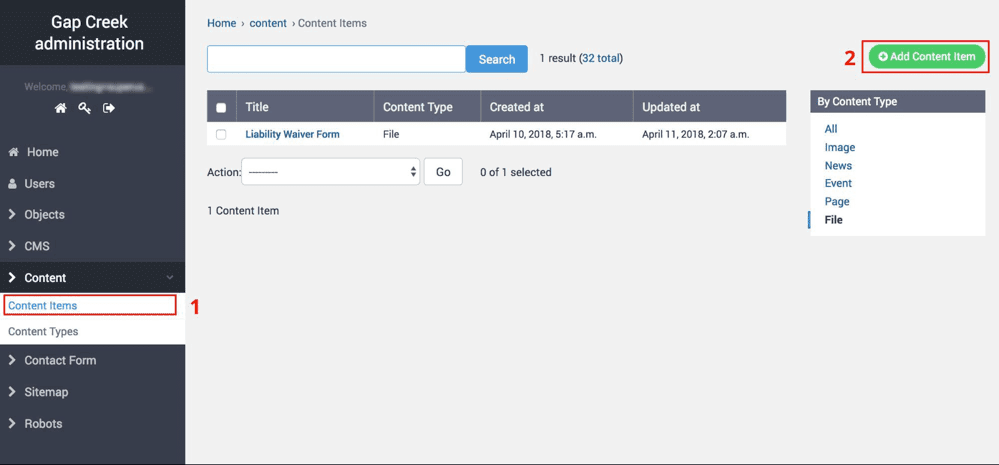
Simply select the green
Add Content Itembutton in the upper right of theContent itemscreen.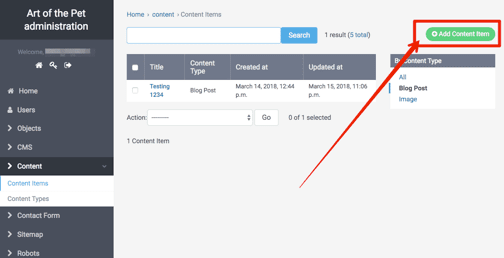
-
Then select the type of Content Type you'd like to create, since we are creating a Blog post, we will select
Blog Post. - Next enter a title for your post.
-
Next click
Save and Continue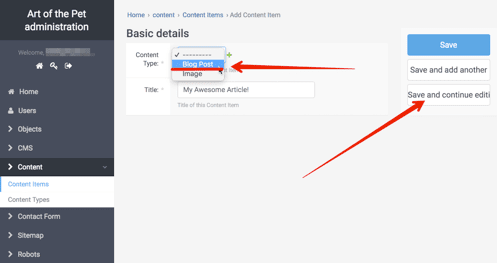
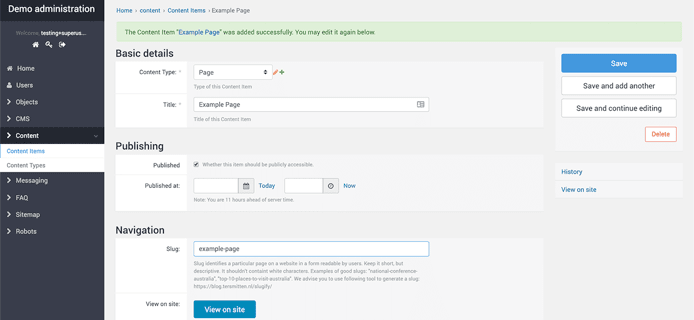
Now let's add some content.
- Pick a url that you’d like this site to be accessed by on your website. For example
my-awesome-article, will be available at https://mysite.com/content/my-awesome-article - Choose a feature image to make an impact with the post
- Add some awesome content!
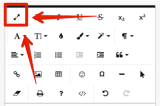
Tip
You can switch the edit to full screen by clicking this icon (shown below)

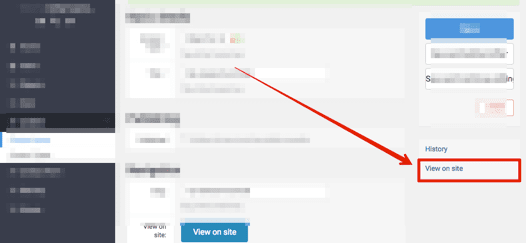
Previewing a Post
You can preview a post by clicking View on site from the right hand sidebar.
Publishing a Post
-
Select the checkbox next to
Publishedin order to publish the post
-
Save and continue editing.
Deleting a Post
- From the post detail page click on the
Deletebutton.

Searching for a Post
In the admin
See Filtering Content by Type / Searching section above.
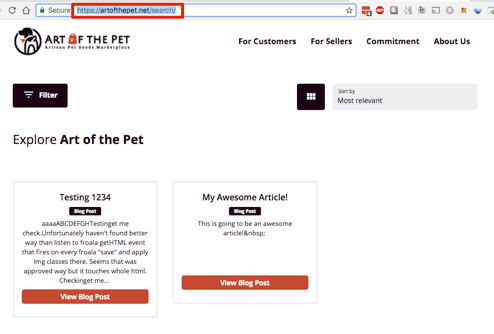
On the site
The blog content can be found publically by visiting https://mysite/com/search/
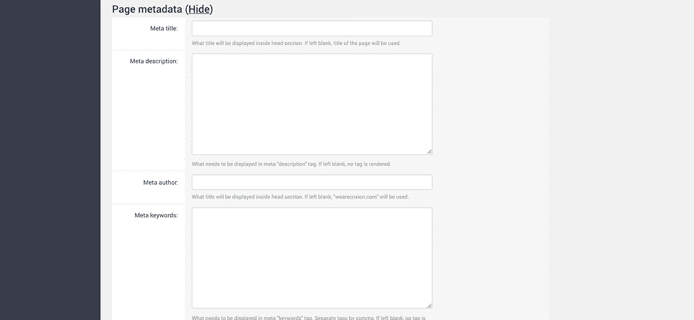
Manage Metadata
Metadata can be managed by clicking the Show link in the Page Metadata section under the Rich text content
Populating the metadata fields is outside the scope of this article. Please read the help text on each.
Beautiful Rich Text Editor
As an administrator, format text as well as html and add images and videos to sections editable via a WYSIWYG rich text editor via the admin dashboard. These items are generally content items including pages, blog posts, publications etc.
Log in to your CNXION administrator dashboard via the url of you tenant platform appended with /admin ie. https://mycnxionsite.com/admin and visit a section of your dashboard with the WYSIWYG editor activated (eg. content items).
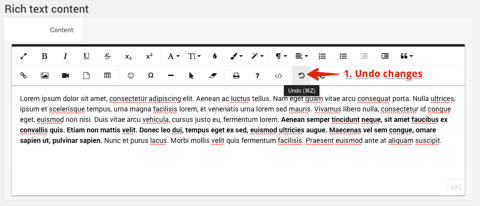
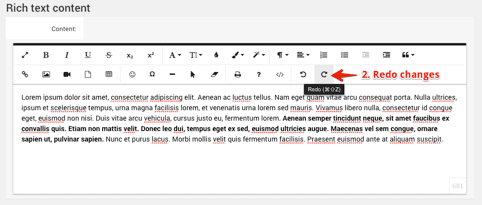
Undo & Redo
- You can undo changes you have made by clicking the
Undoicon in the editor. - You can redo changes you have undone (in step 1) by clicking the
Redoicon in the editor.
Images
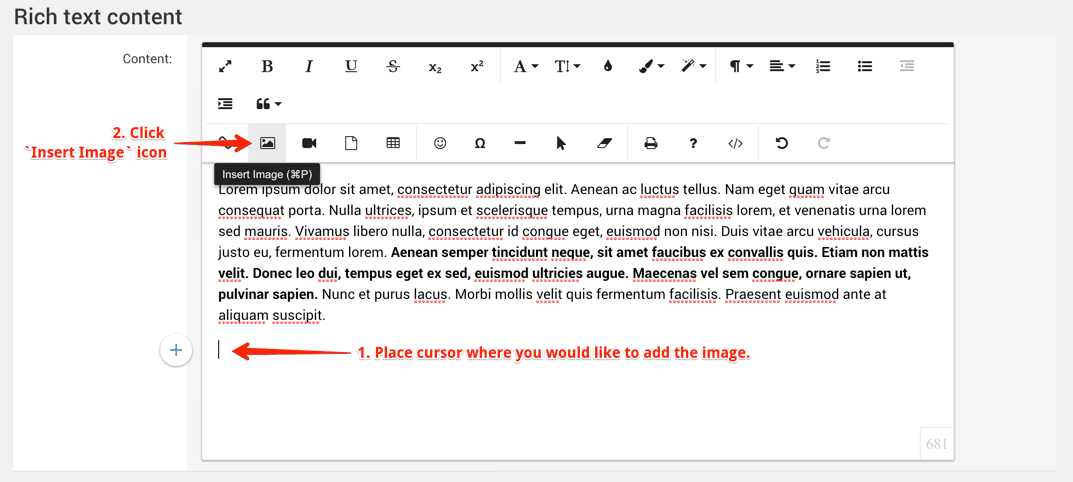
Add Image
- Place your cursor where you would like to add the image within the rich text editor.
- Click on the
Insert Imageicon in the editor.
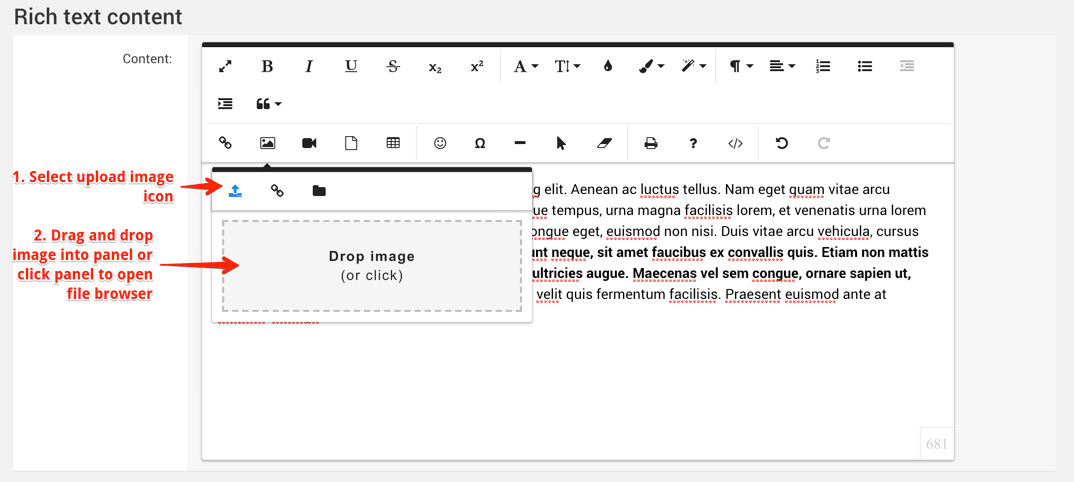
Drag & Drop
- Select
Upload Imageicon. - Drag and drop an image into the window, or click field to upload using file browser, in order to add the image to the content inside the editor.
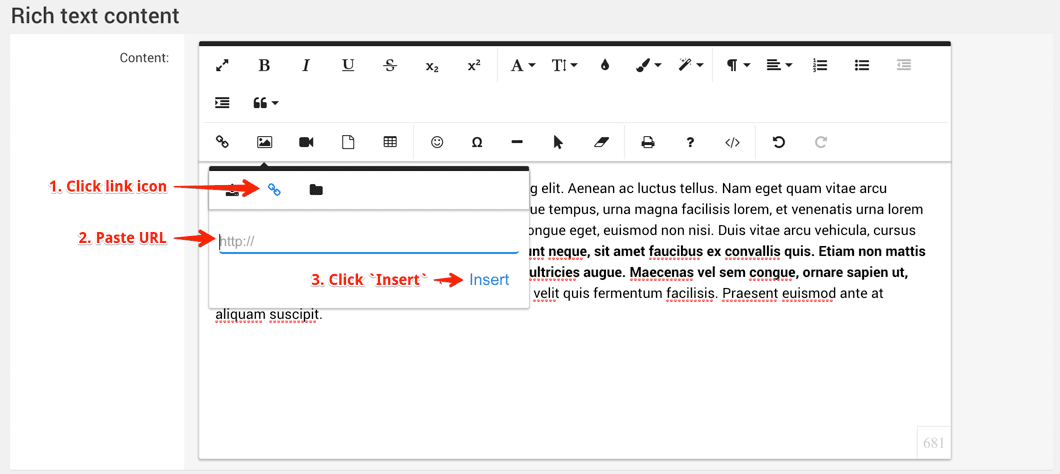
Add URL
- Click the
Linkicon in the upload image popup window. - Enter a specific URL for the image you wish to add.
- Click the blue
Inserttext to add the add the image via the URL.
Note
For security reasons CNXION currently restricts adding images via urls from domains other than the tenant CNXION domain your site is running on. If required please contact CNXION via our support channels in order to add a whitelisted domain where you may link to images.
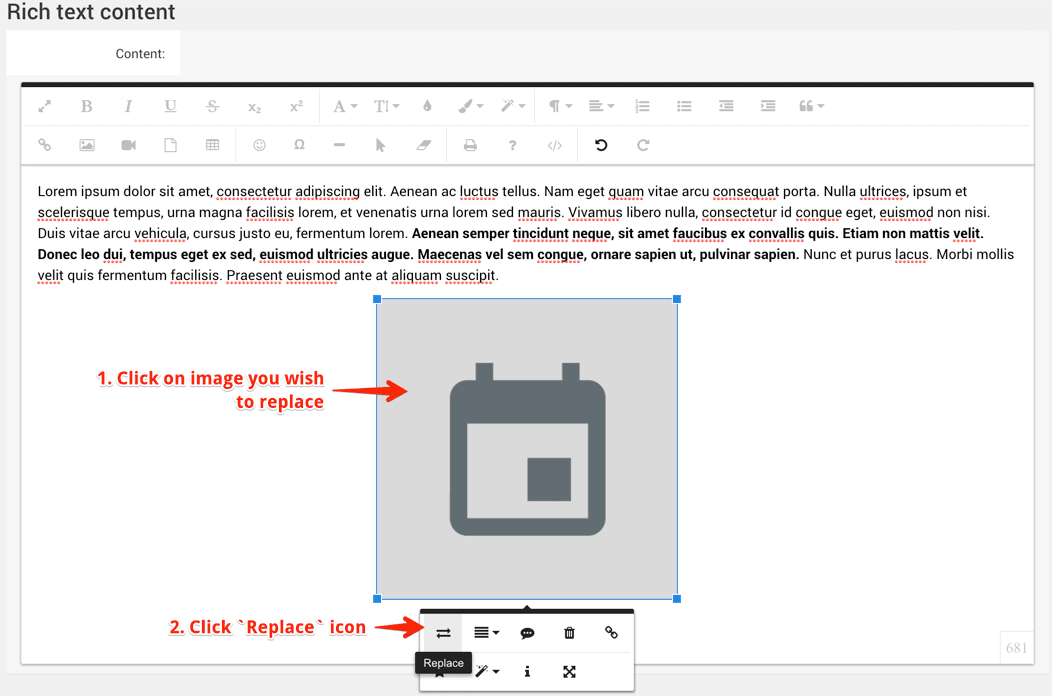
Replace Image
- Click on the image you wish to replace within the rich text editor.
- Click on the
Replaceicon from the popup toolset that appears. - Drag and drop a new image or enter a url to a new image in order to replace it.
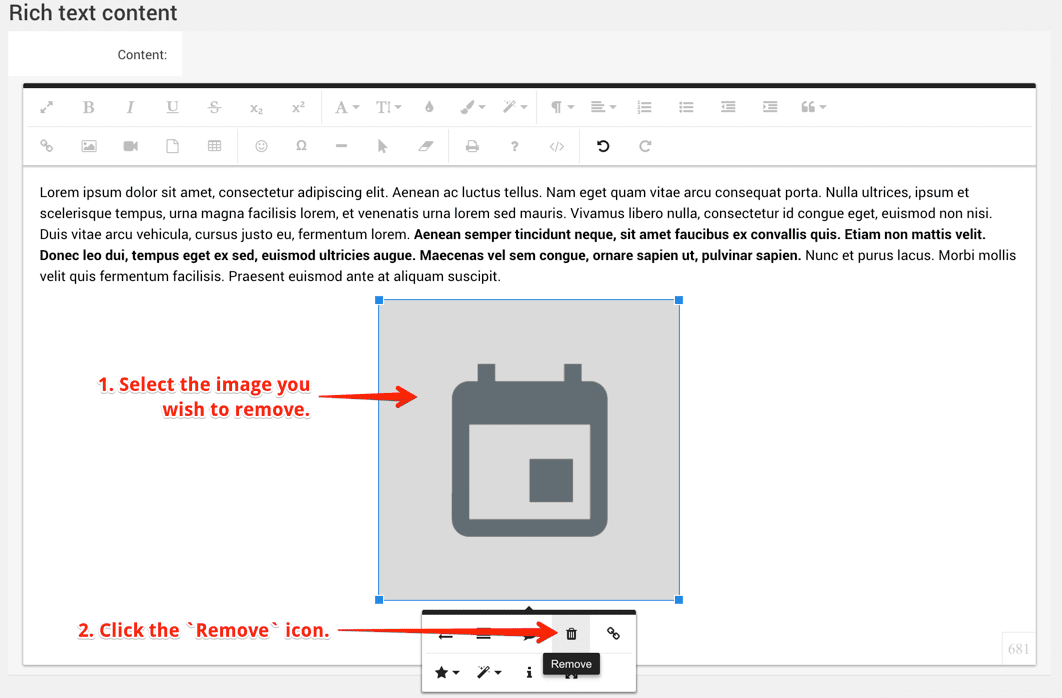
Remove Image
- Click on the image you wish to remove within the rich text editor.
- Click on the
Removeicon in the popup toolset that appears.
Style & Format
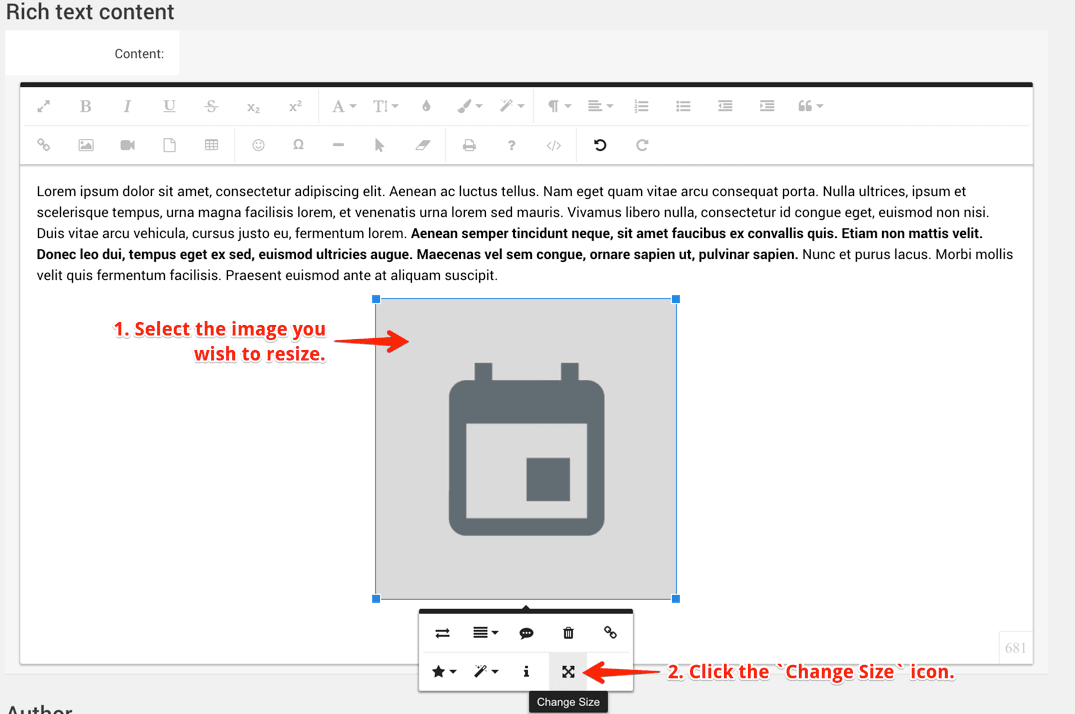
Resize
- Click on the image you wish to resize within the rich text editor.
- Click on the
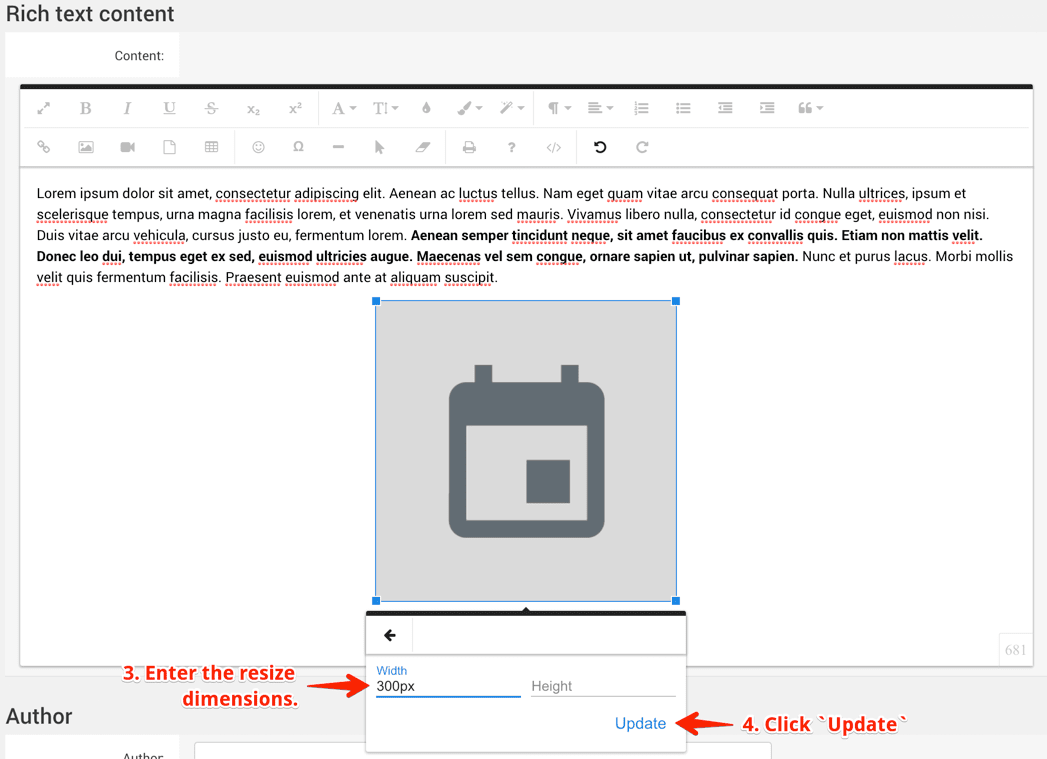
Change Sizeicon in the popup toolset that appears. - Enter the dimensions to which you want to resize the image.
- Click the blue
Updatetext to resize the image.
Tip
If you add only a single width OR height dimension then the image will be scaled proportionately to that size, respecting the original images aspect ratio. If you add both width AND height dimensions then the image may be disproportionately scaled.
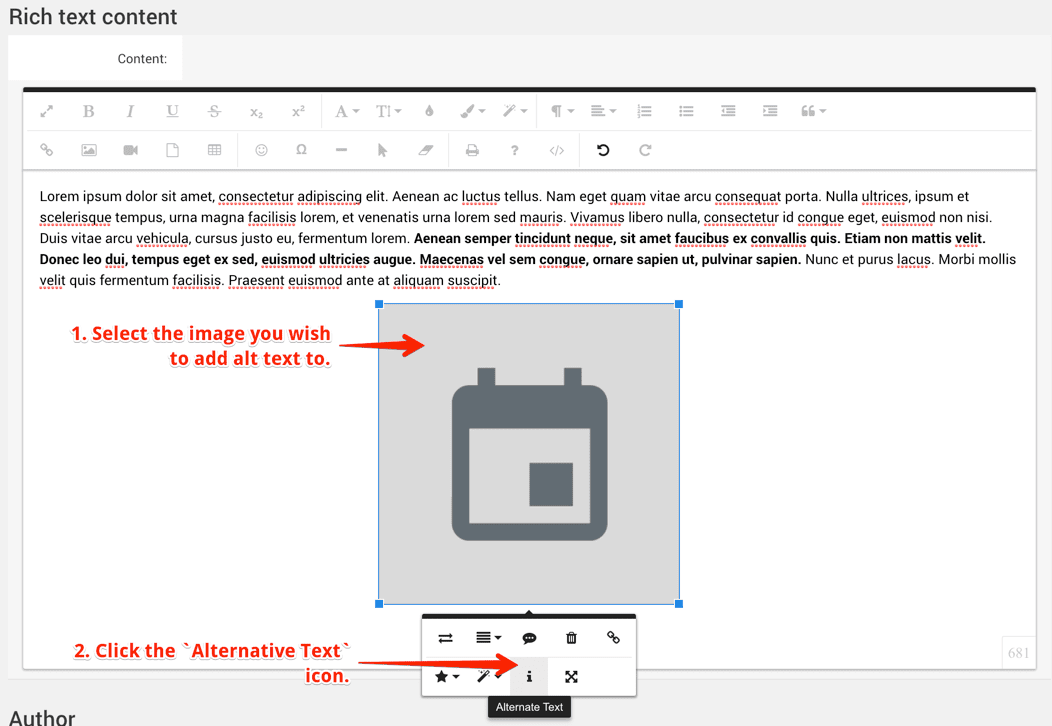
Alternate Text
- Click on the image you wish to add alt text to within the rich text editor.
- Click on the
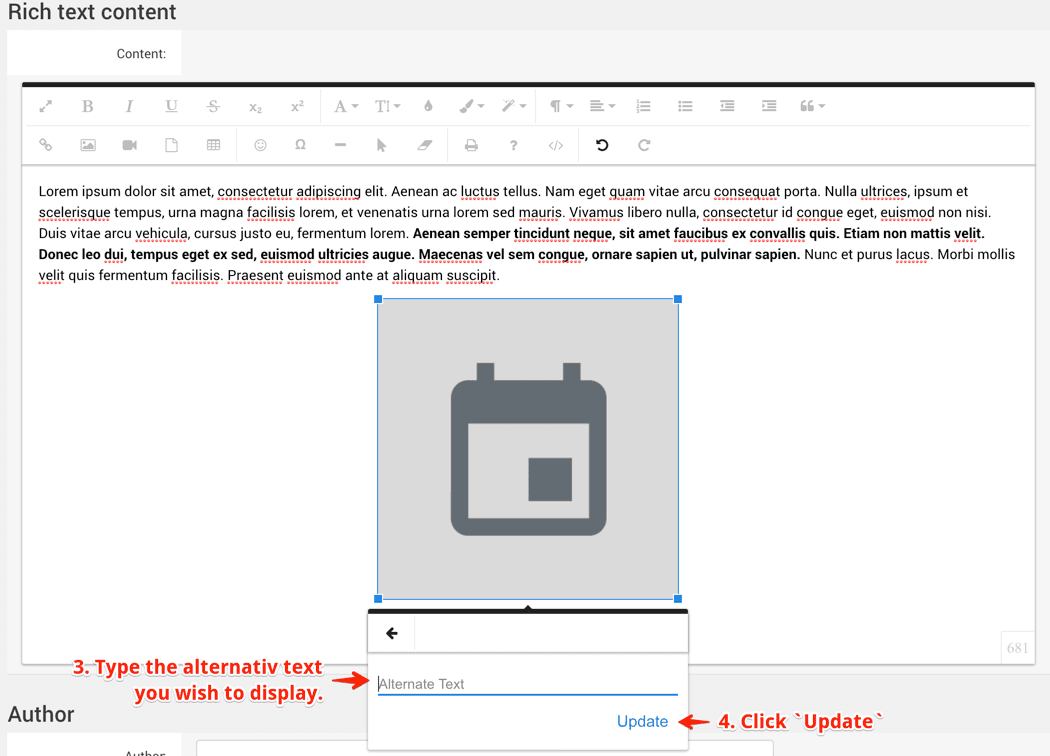
Alternate Texticon in the popup toolset that appears. - Type the alternate text you wish to display on the page in the case that the image wont load.
- Click the blue
Updatetext to add the alternative text to the image.
Tip
Adding descriptive alternative text to images can positively affect the pages SEO rankings.
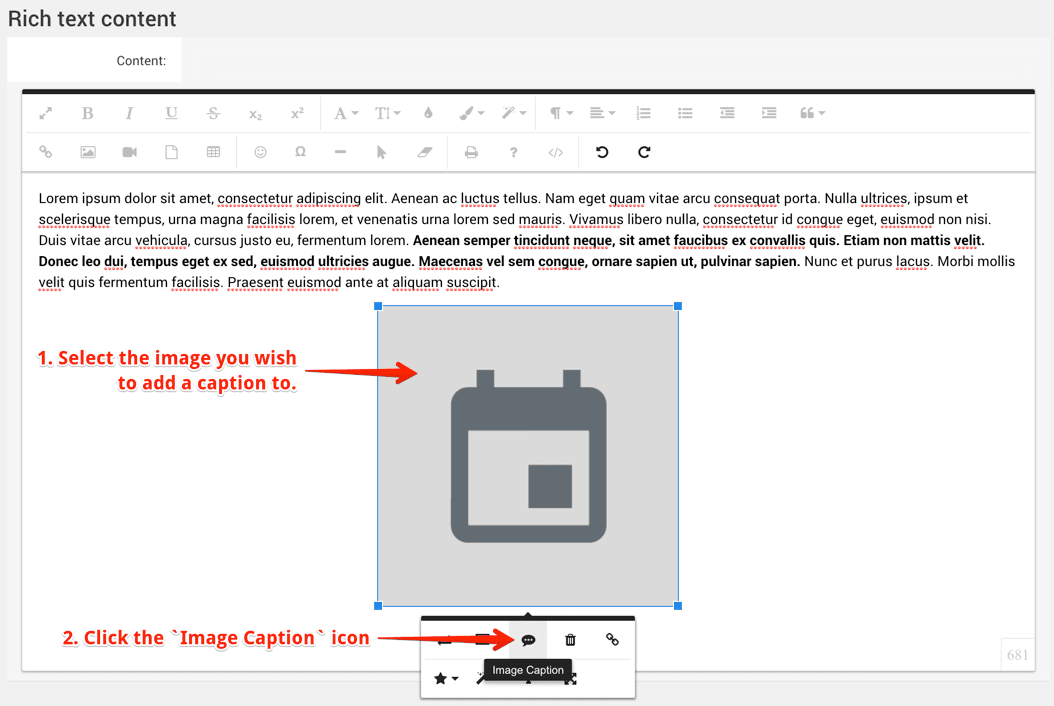
Caption
- Click on the image you wish to add a caption to within the rich text editor.
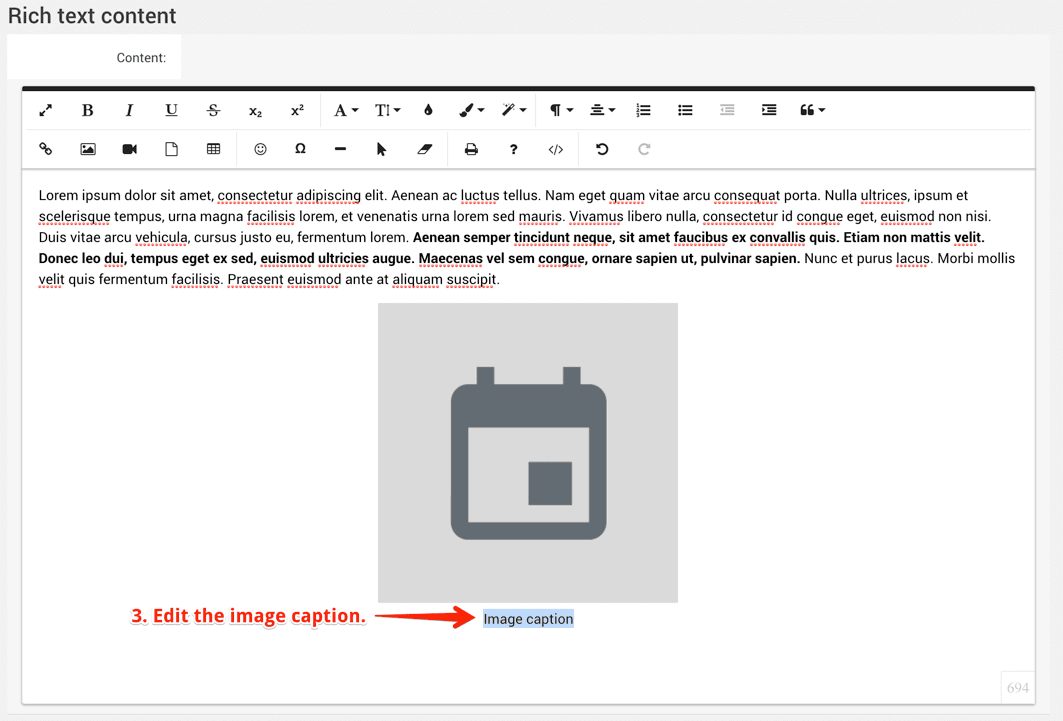
- Click on the
Image Captionicon in the popup toolset that appears. - Edit the image caption text that is displayed under the image within the rich text editor.
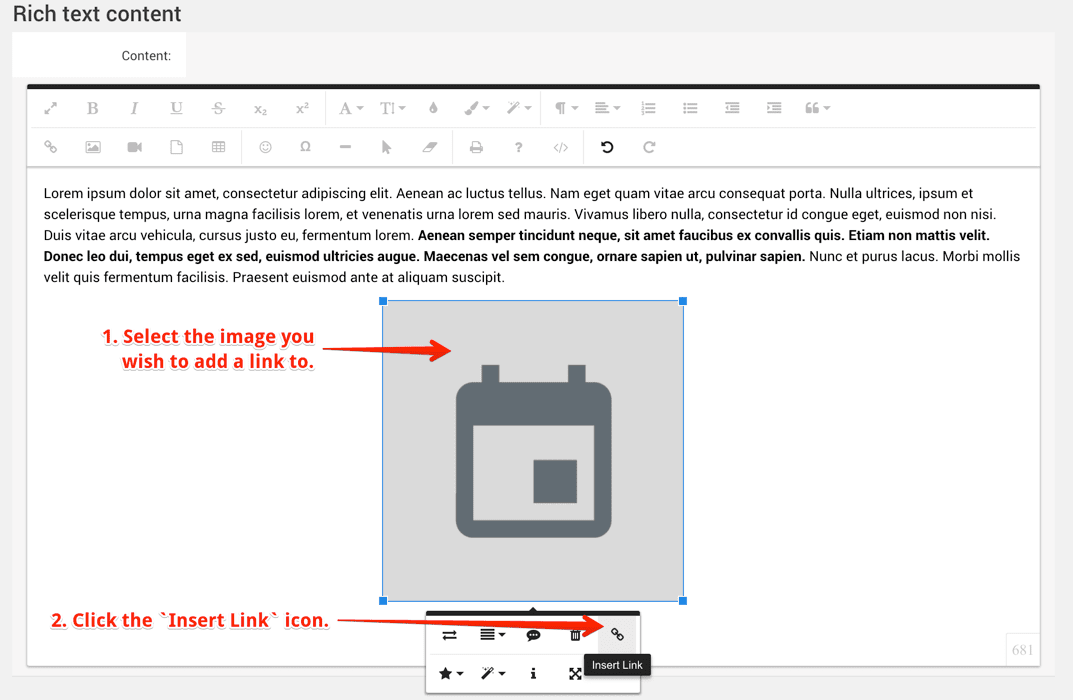
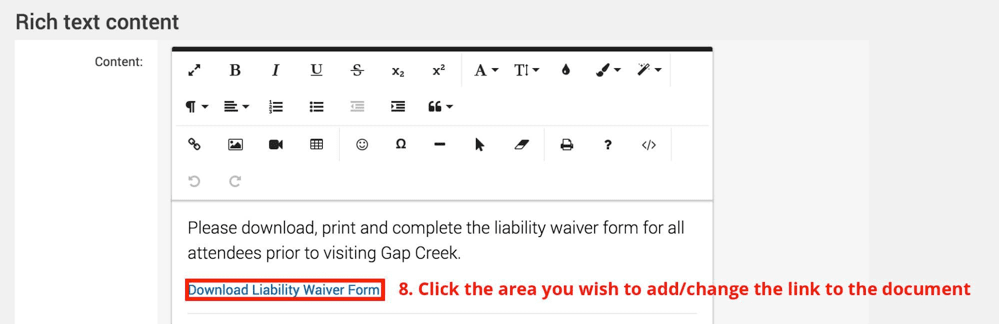
Link
- Click on the image you wish to add a link to within the rich text editor.
- Click on the
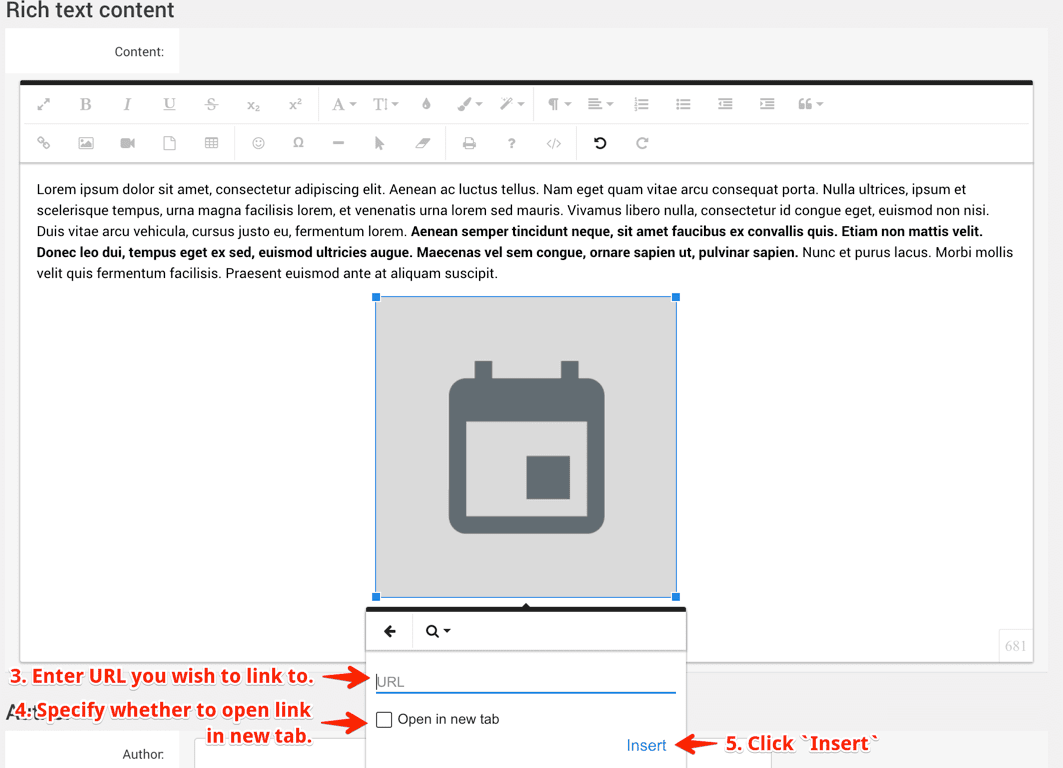
Insert Linkicon in the popup toolset that appears. - Enter the URL that you wish to link to when a user clicks on the image.
- Specify whether you want the link to open in the same window or open in a new tab.
- Click the blue
Inserttext to add the link to the image.
Tip
It is best practice to open any links to domains outside of your website in new tabs so a user is not redirected away from your website.
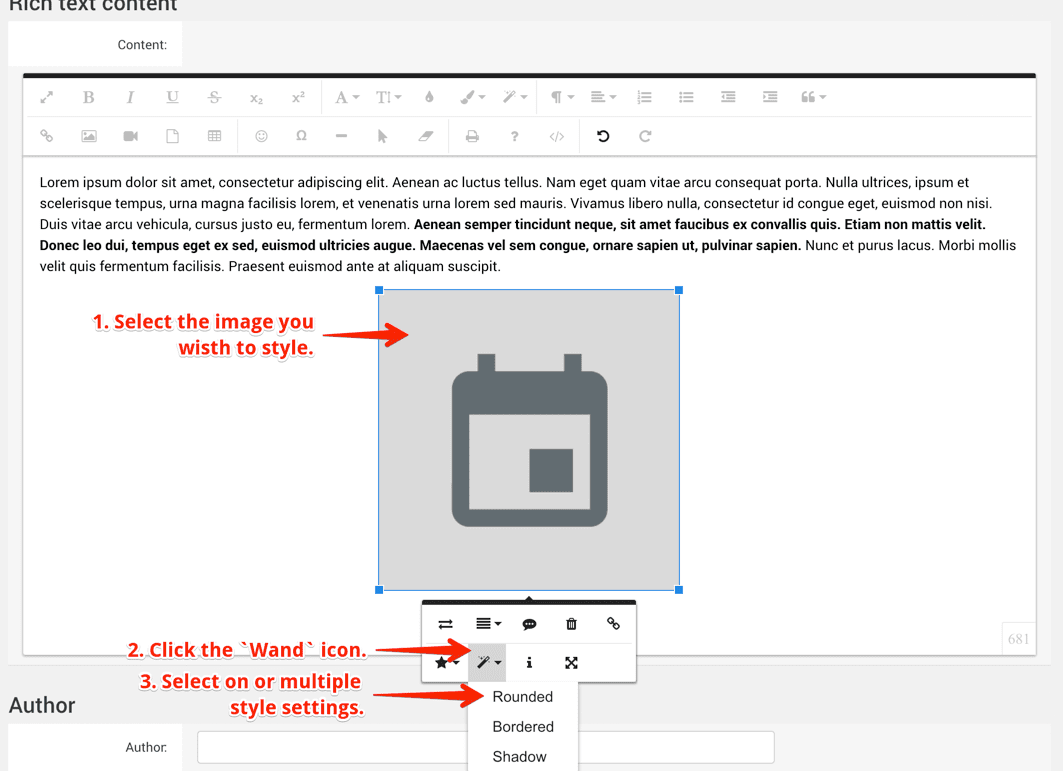
Borders & Shading
- Click on the image you wish to add border and shadow styling to within the rich text editor.
- Click the
Wandicon - Select one OR multiple border and shading options from the drop down list including
Roundedgiving rounded corners to the image,Borderedadding a subtle border to the image and/orShadowadding a shadow behind the image.
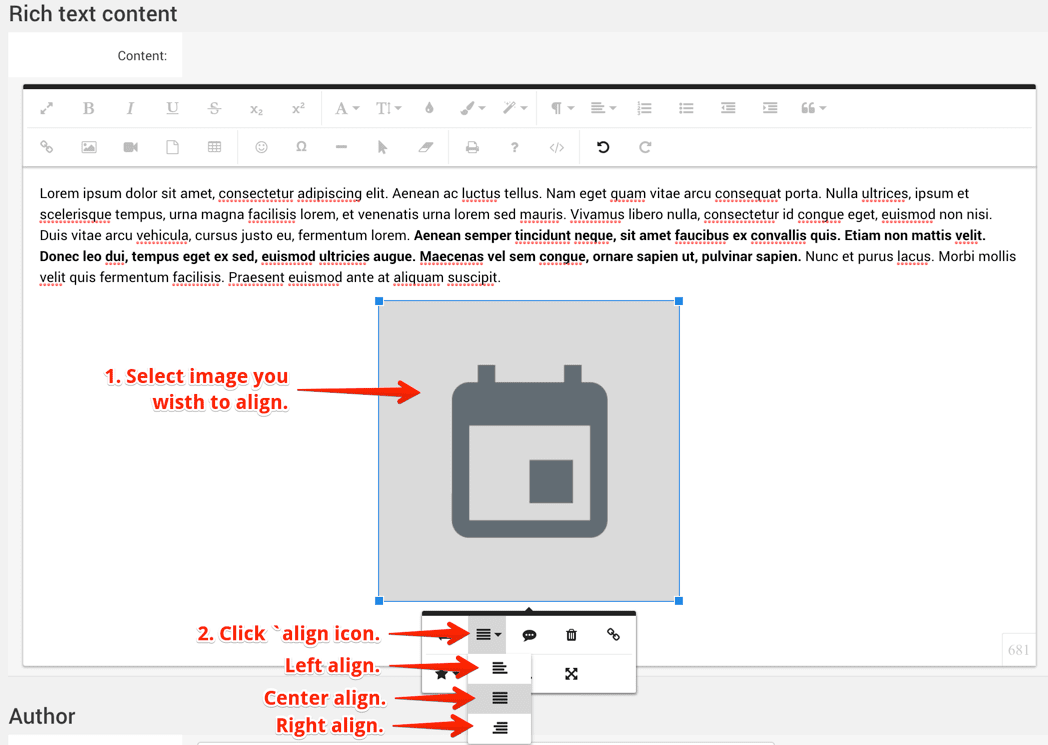
Alignment
- Click on the image you wish to align within the rich text editor.
- Select either
left,centerorrightalignment for the image.
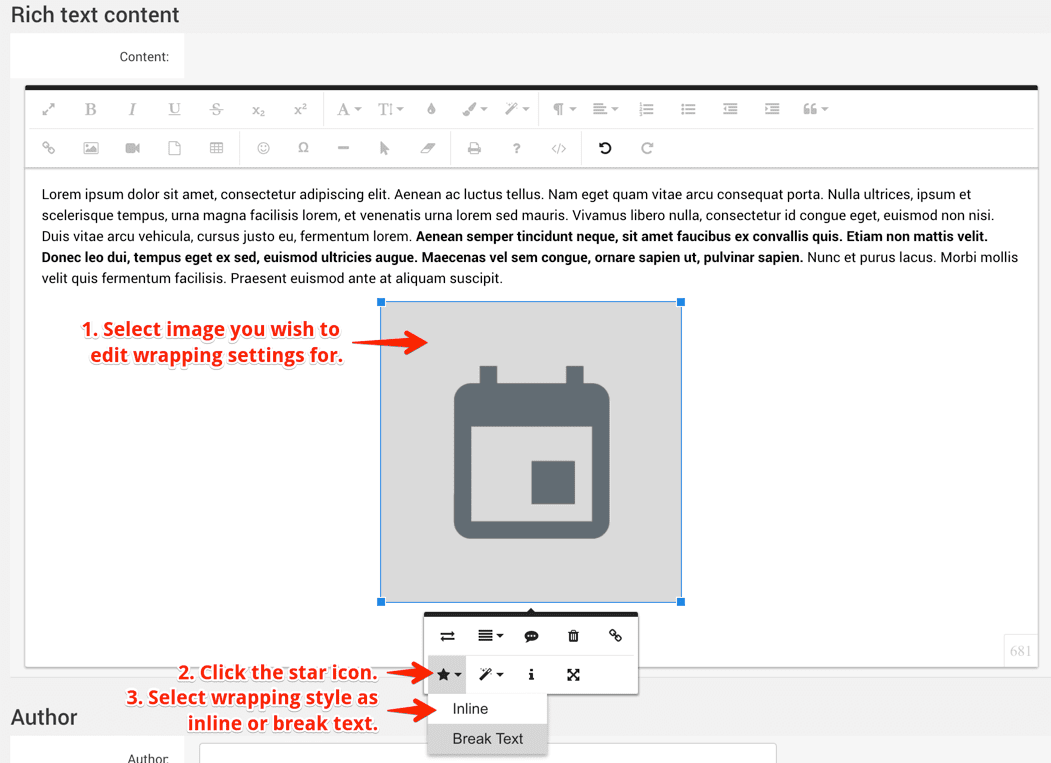
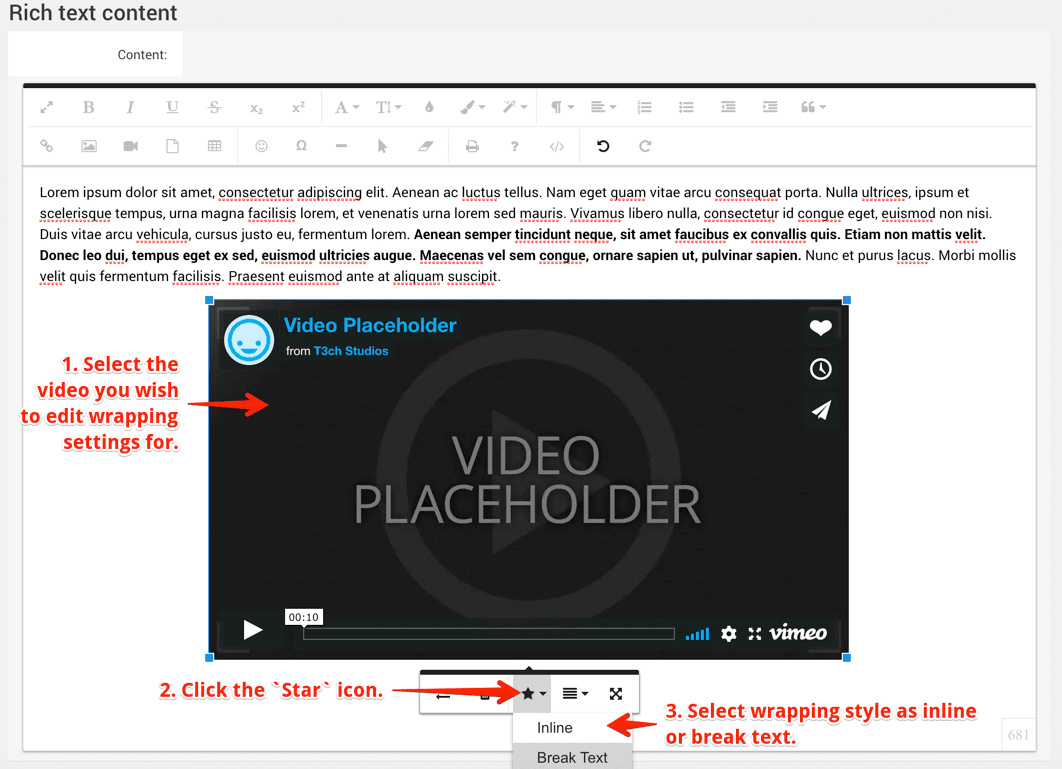
Wrapping
- Click on the image you wish to control text wrapping within the rich text editor.
- Select the
Staricon. - Select either
inlineto wrap text around an image orbreak textto display the image and text as separate blocks with no wrapping.
Videos
It is possible to paste a video url or embed it with code into pages, blocks and content types such as blog posts using the rich text editor on CMS pages and content items.
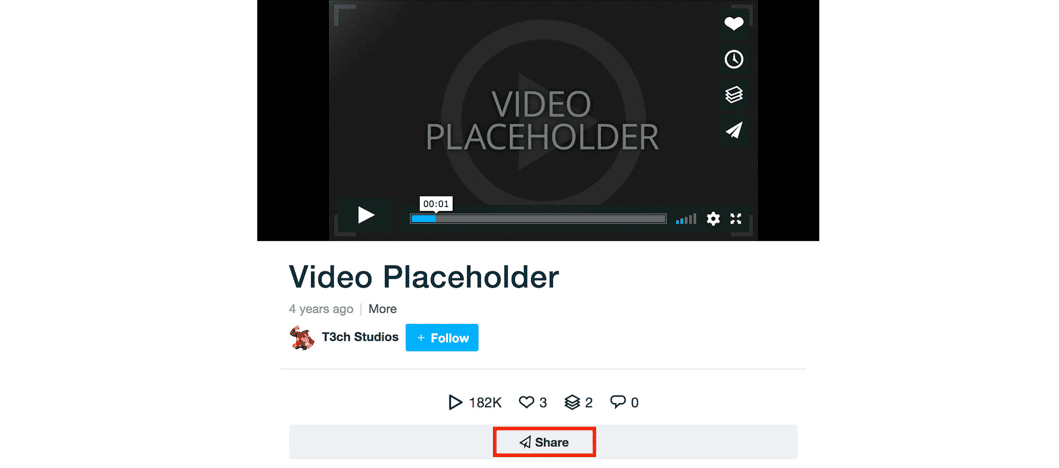
Get Vimeo url or embed code for video.
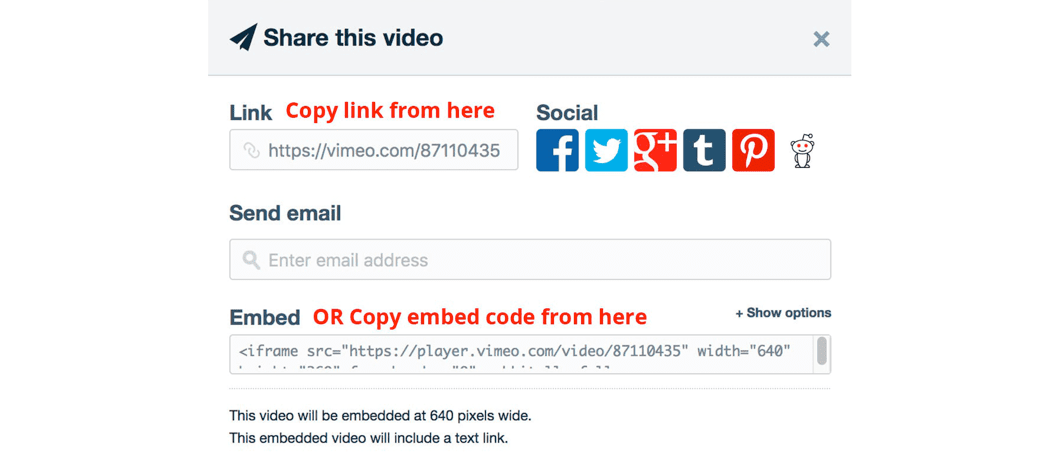
- From the video page on vimeo click the
sharelink under the video highlighted in the screenshot below. - From the popup window that is displayed either copy the link or the embed code to paste into the editor.
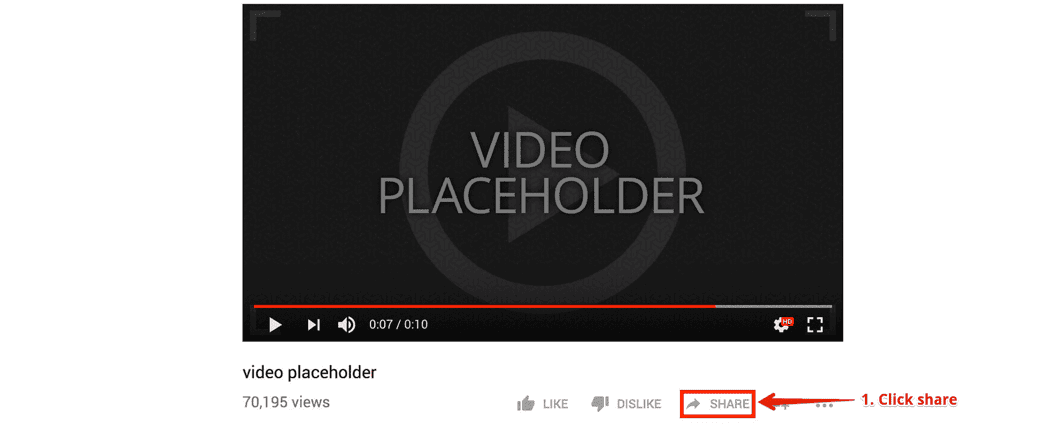
Get Youtube url or embed code for video.
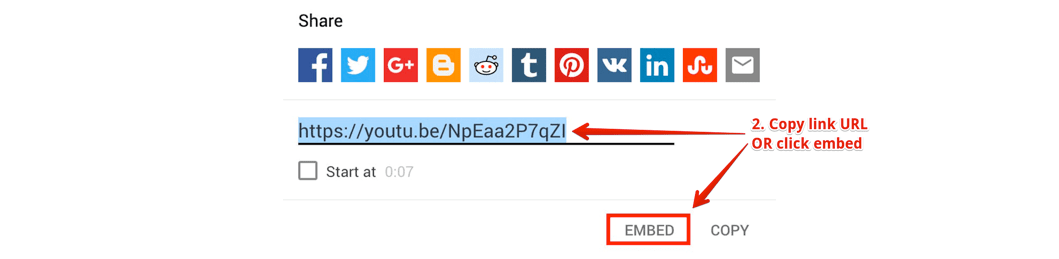
- From the video page on youtube click the
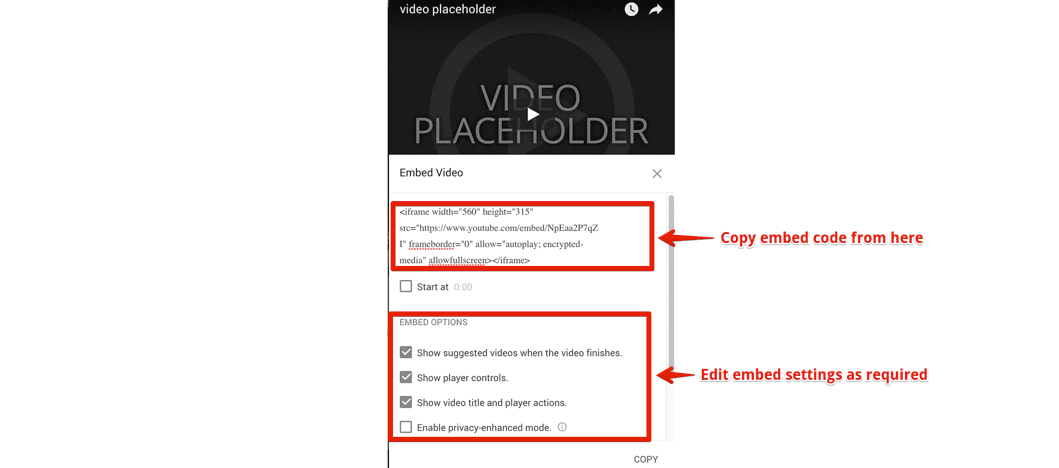
sharelink under the video highlighted in the screenshot below. - From the popup window that is displayed you can copy the video link (to use in the paste video URL step below) or click the embed link highlighted in the screenshot below to open a new window allowing you to control embed settings and copy embed code.
The popup that is shown after clicking the embed button highlighted above is shown below.
Insert Video
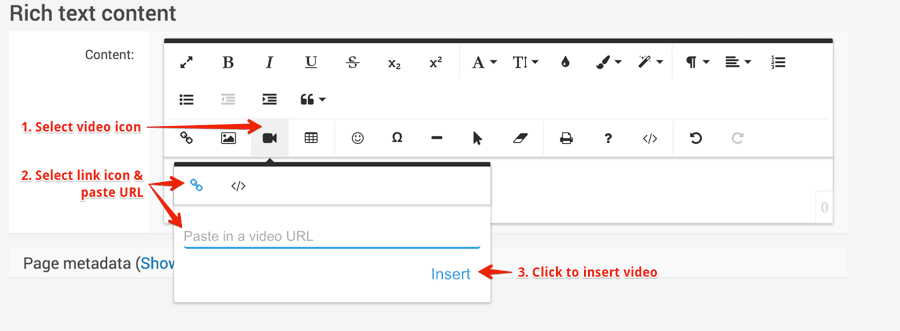
Paste Video URL
- From the rich text content editor select the video icon, the first icon highlighted is the video url link.
- Paste the video link you wish to add.
- Click the blue
Inserttext link, the video will be inserted into your content.
Embed Video
- From the rich text content editor select the video icon
- Click the second embed icon in the popup window.
- Paste the embed code you wish to add.
- Click the blue
Inserttext link, the video will be embedded in your content.

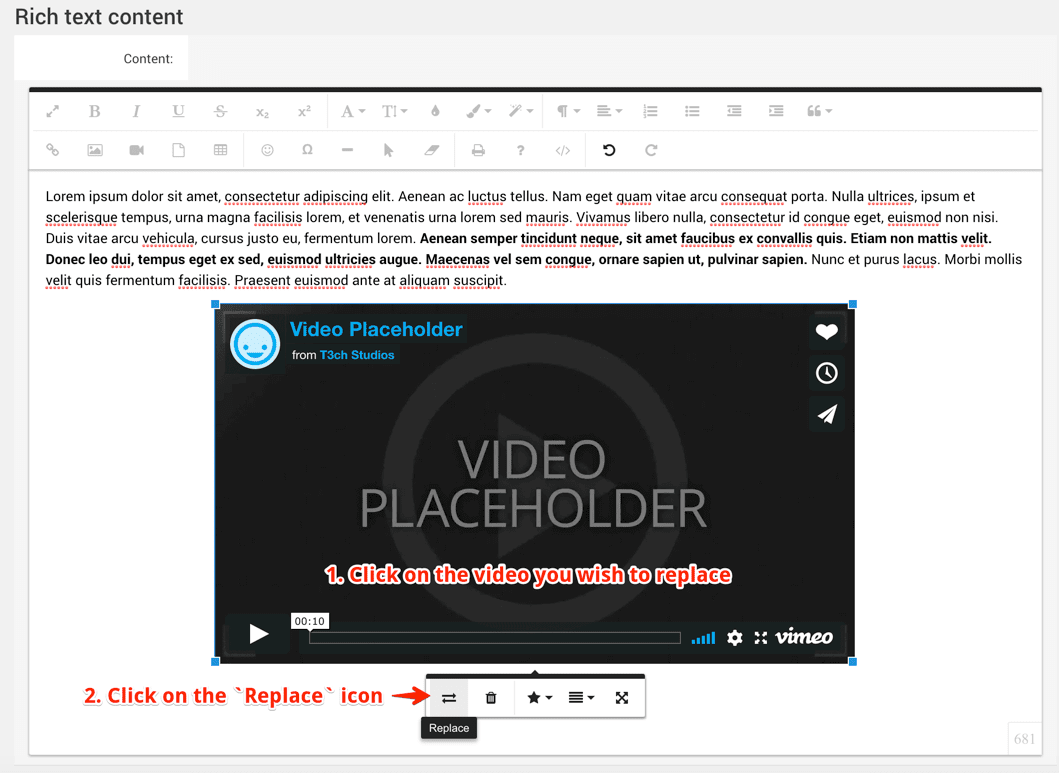
Replace Video
- Click on the video you wish to replace within the rich text editor.
- Click on the
Replaceicon from the popup toolset that appears. - Enter a url or embed code to a new video in order to replace it.
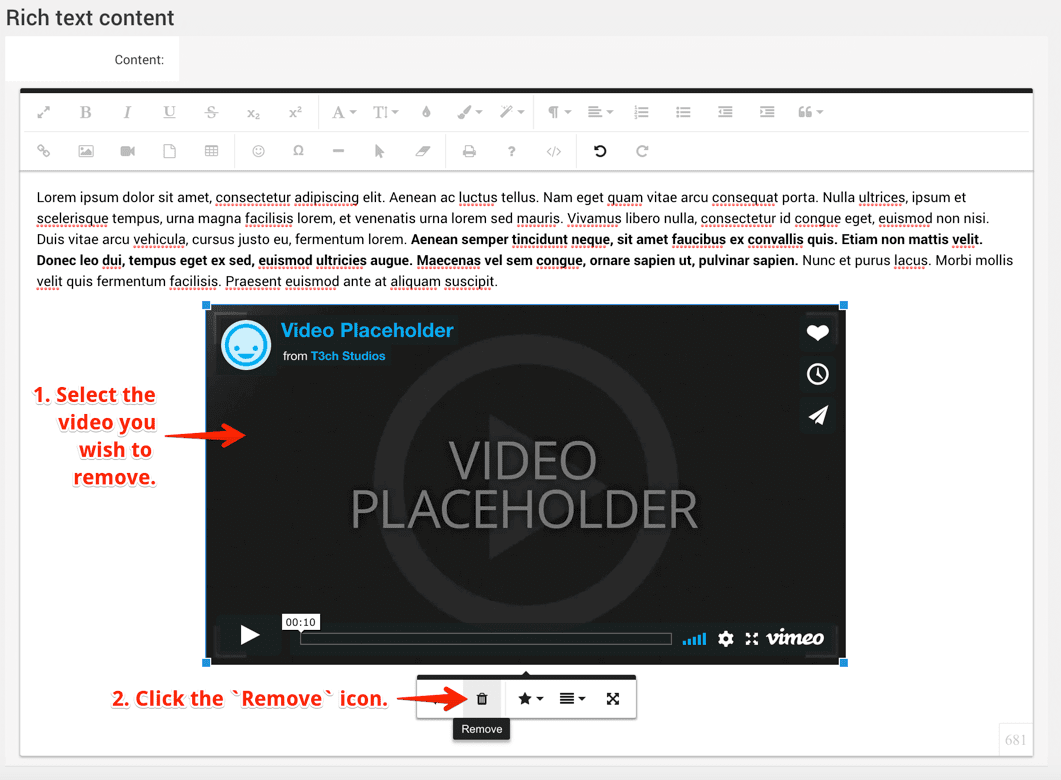
Remove Video
- Click on the video you wish to remove within the rich text editor.
- Click on the
Removeicon in the popup toolset that appears.
Style & Format
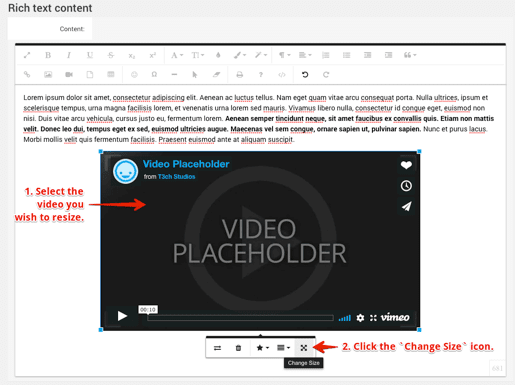
Resize
- Click on the video you wish to resize within the rich text editor.
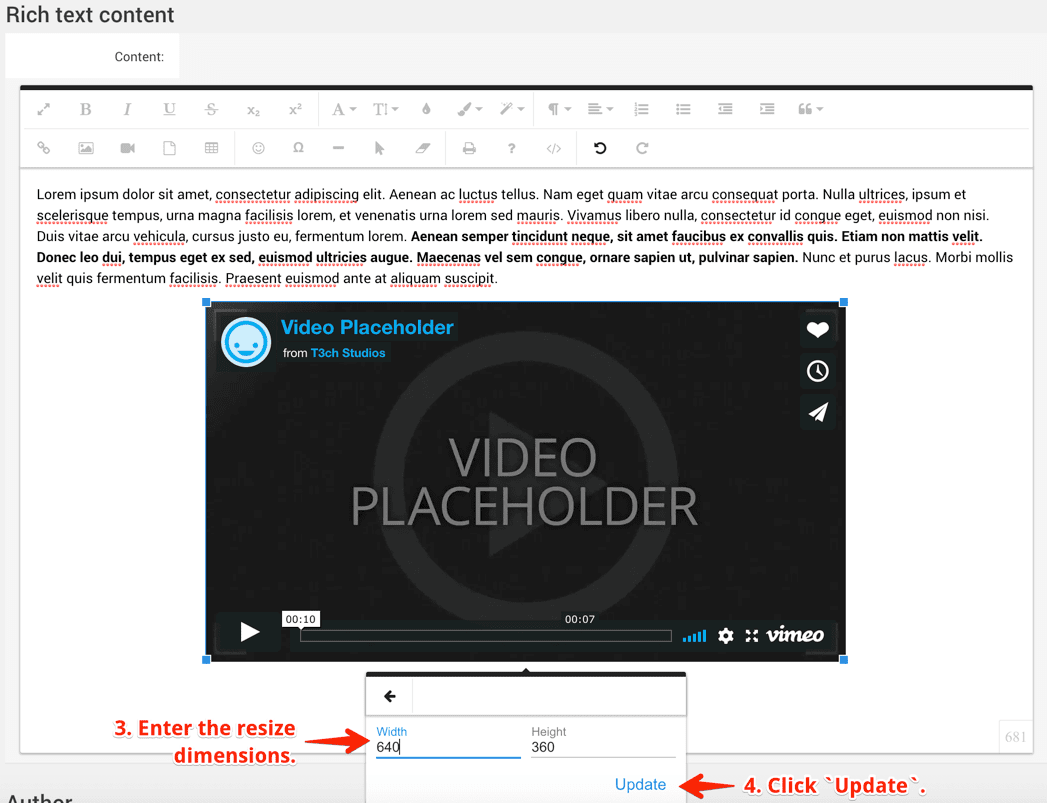
- Click on the
Change Sizeicon from the popup toolset that appears. - Enter the dimensions to which you want to resize the image.
- Click the blue
Updatetext to resize the video.
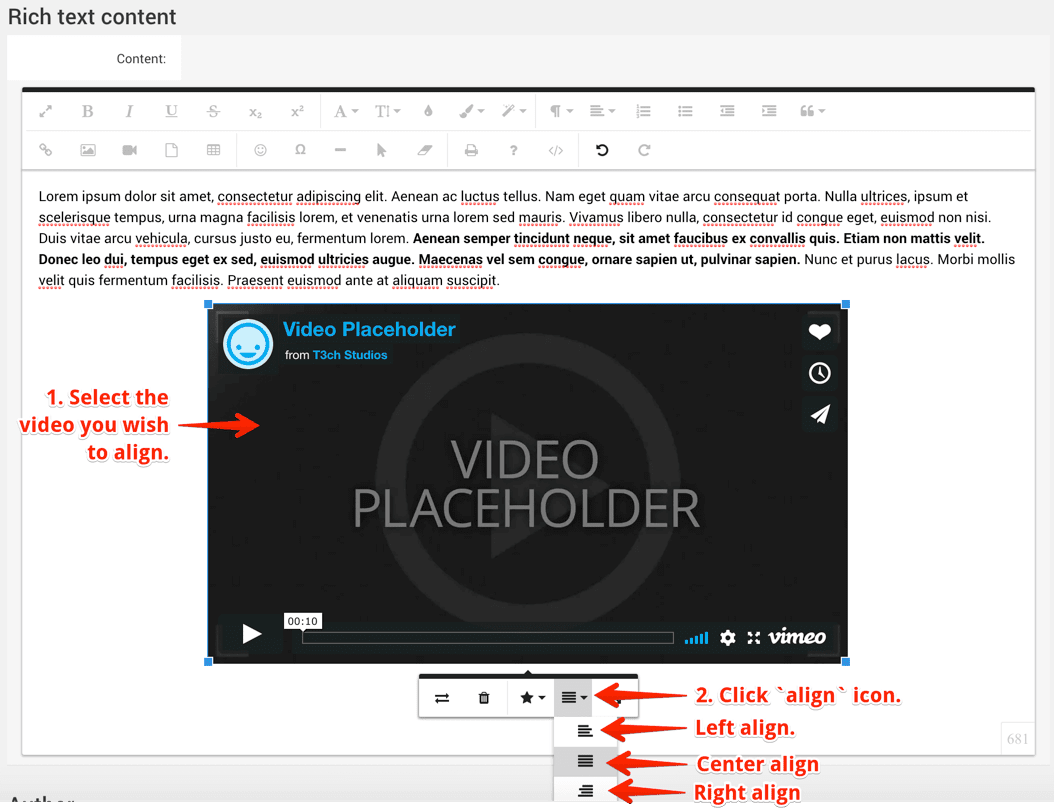
Alignment
- Click on the video you wish to align within the rich text editor.
- Select either
left,centerorrightalignment for the video.
Wrapping
- Click on the image you wish to wrap text around within the rich text editor.
- Select the
Staricon. - Select either
inlineto wrap text around the video orbreak textto display the video and text as separate blocks with no wrapping.
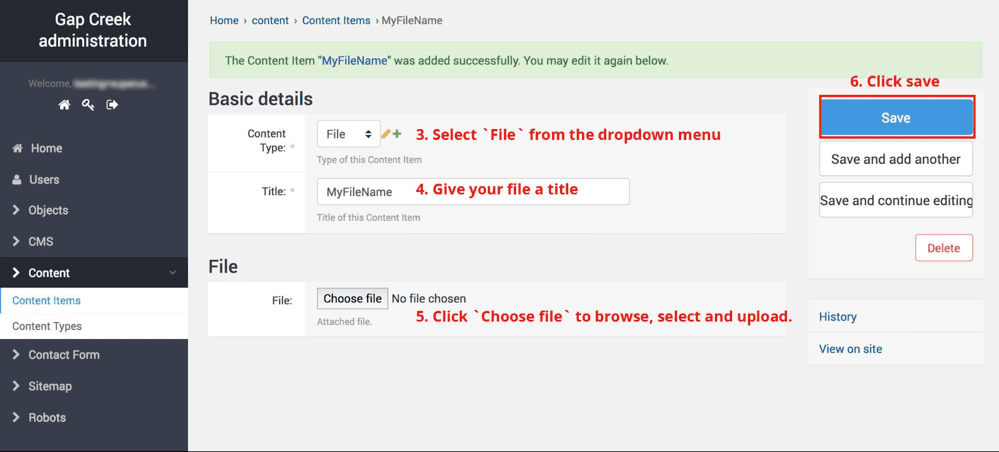
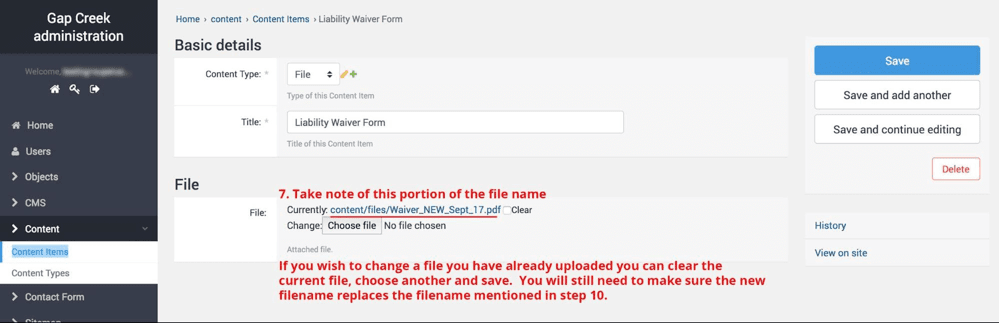
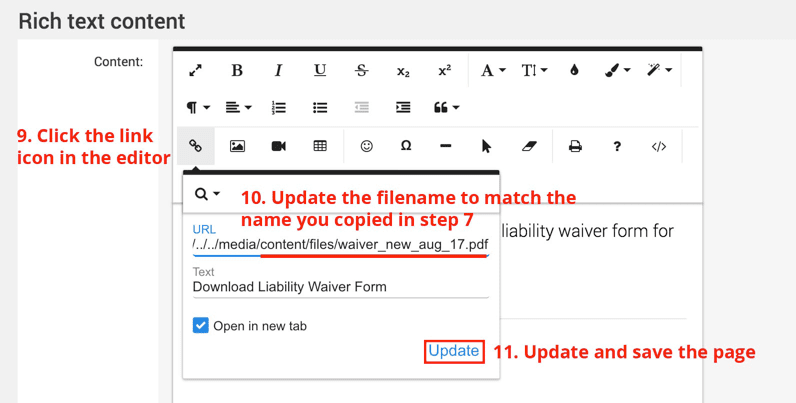
Downloadable Resources
Here you can upload PDFs or other documents you wish to make available for users to download from your website pages.
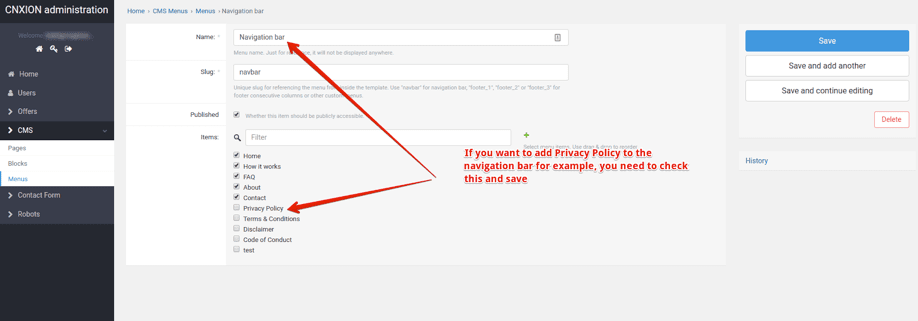
Navigation Menus
As an admin, be able to manage menu sections of the page, eg. top bar links, footer links. Also possible to create other menu sections and use render them in the custom template.
It is possible manage various menus, when enabled inside admin section administrator can create different menus. Now if those menus are supported by themes, you can edit items in the menus directly in admin.
Examples
- Demo project
- Art of the Pet - there are 3 menus there.
We have navigation bar and menu and Footer 1st column menu. If you click one of them, you can inside reorder menu items or change what gets displayed.
So for example if we want to add a link to a new page, we create a new page and go to the menu, where we select it should be displayed.
Possible to add as many menus as we want, just matter if themes support them.
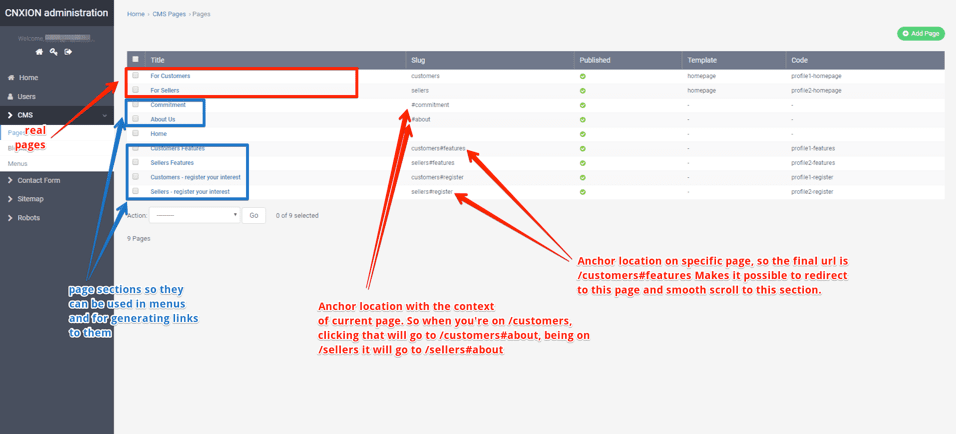


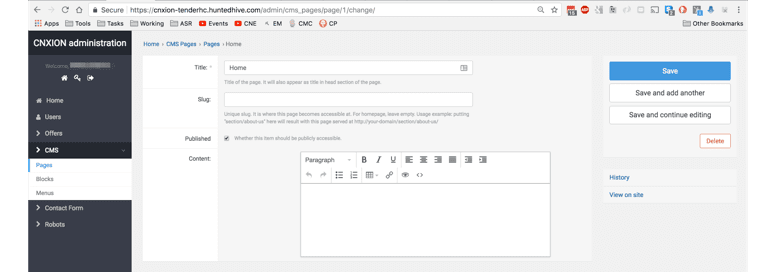
Legacy CMS Pages Module
As an admin, be able to manage public Pages in Admin Panel, change their titles, content, urls. Public users can navigate to those Pages. By default page.html template stored in cnxion/features/cms_pages/templates is used. If frontend_djb4 is enabled, then templates in appropriate theme are used. If you want to customise CMS Pages templates entirely without the need of whole front end, just add them to cnxion/tenants/{tenant}/frontend/templates
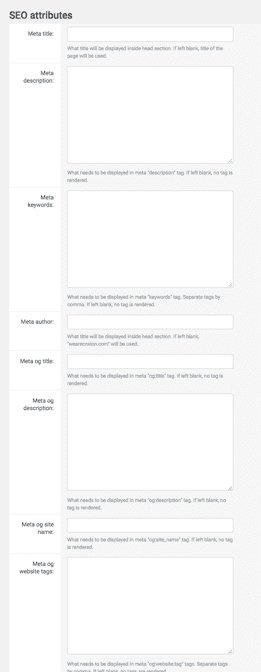
If it is enabled it is possible in tenant admin to put SEO attributes including OG metadata. It nothing is input, then they won't show.
- Example for demo project: https://cnxion-demo.huntedhive.com/admin/cms_pages/page/
- See
SEO attributesseection: https://cnxion-demo.huntedhive.com/admin/cms_pages/page/5/change/
Example edit Profile Landing pages
Here we describe how to edit pages such as profile landing pages, e.g. Customers / Sellers pages. This is particularly relevant for those clients who have a Validate package waiting list theme live.
Links:
- https://yoursite.com/admin/cms_pages/page/1/change/
- https://yoursite.com/admin/cms_pages/page/7/change/
Much of the content on the site is implemented in Blocks these can be seen listed here:
- https://yoursite.com/admin/cms_blocks/block/
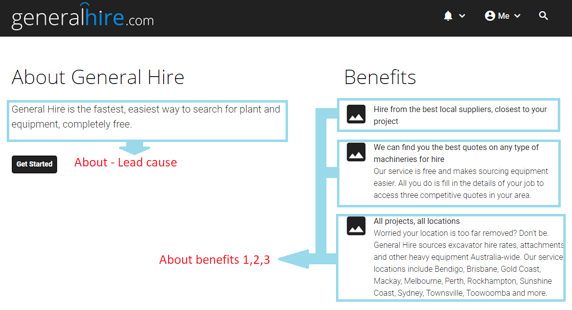
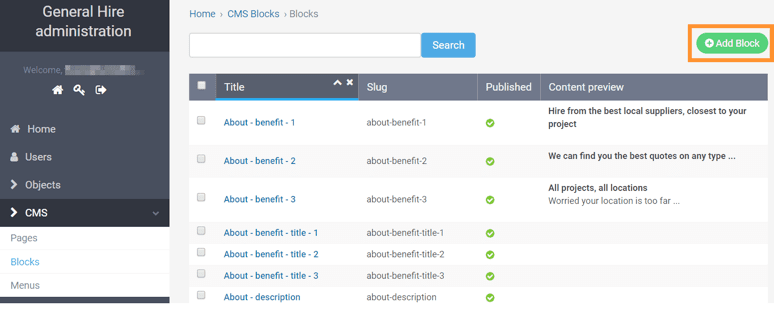
Blocks
As an admin, be able to manage content of the pages sections in Admin Panel. The image below shows a few example blocks that are editable via admin.
Blocks are accessed from the CMS > Blocks menu in the left hand sidebar menu.
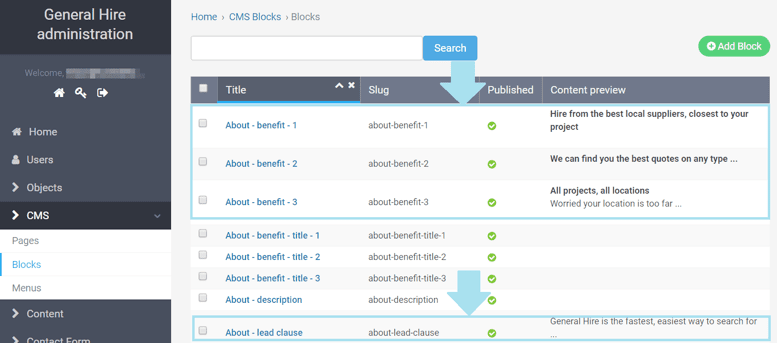
To easily find the content you wish to edit you can type the content you are searching for into the search bar (at the top left of the CMS block admin page) and the relevant block will be displayed in the search results.
Click on the block title to edit it's contents and don't forget to save your changes.
Adding Blocks Manually
- Similar to other sections, you can find green
Add Blockbutton on top left to add a new block; - There is a
Searchbar on top to search for content to find a specific block to edit. - We can delete blocks in
Actionscroll down at the bottom of the page.
Contact Form
See messaging
Frequently Asked Questions
As an admin, be able to manage Frequently Asked Questions in Admin Panel (view, modify, delete, add). API for exposing published questions.
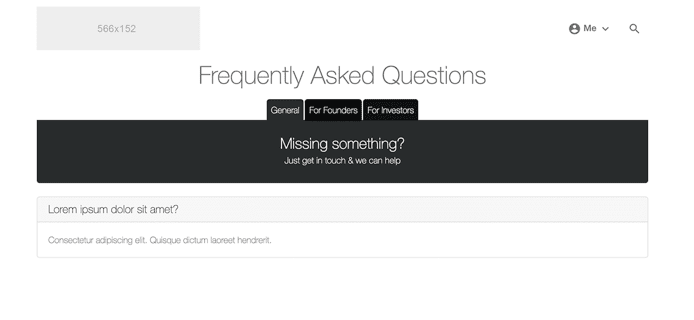
Info
FAQ Categories are listed as the tabs across the tops of the FAQ page and FAQ Questions and Answers are listed under their corresponding categories.
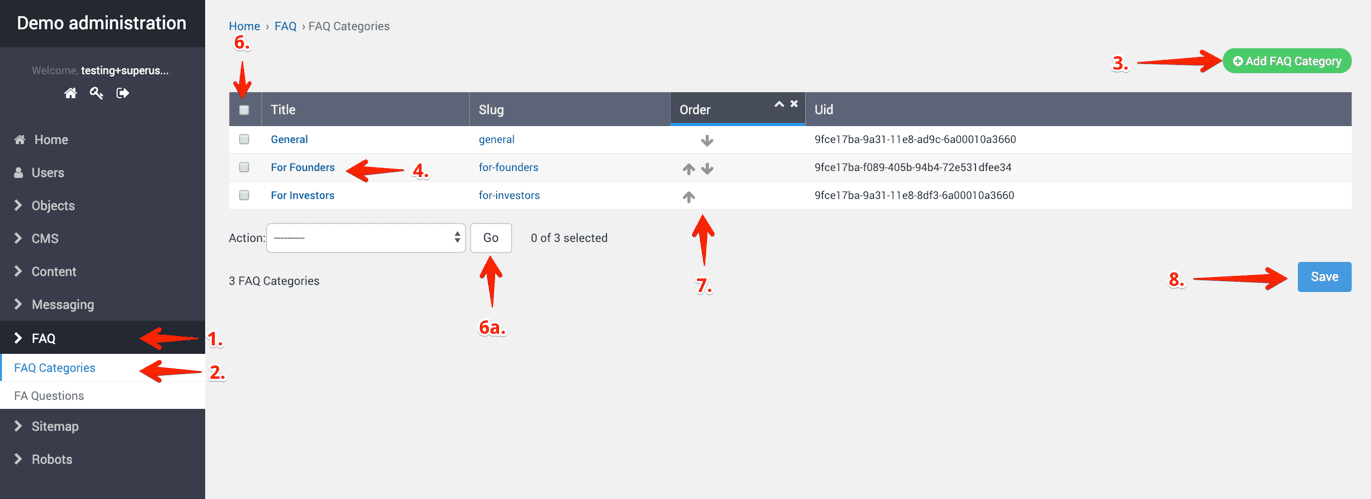
FAQ Categories
- Log in to the administrator panel.
- Select
FAQfrom the left hand sidebar menu. - Select
FAQ Categoriesfrom the left hand sidebar menu. - To
adda new category click theAdd FAQ Categorybutton. - To
edita cateogory, click on the corresponding category title link. - To
deletecategories select the checkboxes next to the categories you wish to delete, selectdeletefrom the action dropdown menu and click theGobutton at 6a. - To reorder the category tabs click the arrows in the
Ordercolumn of the table. - Save your changes.
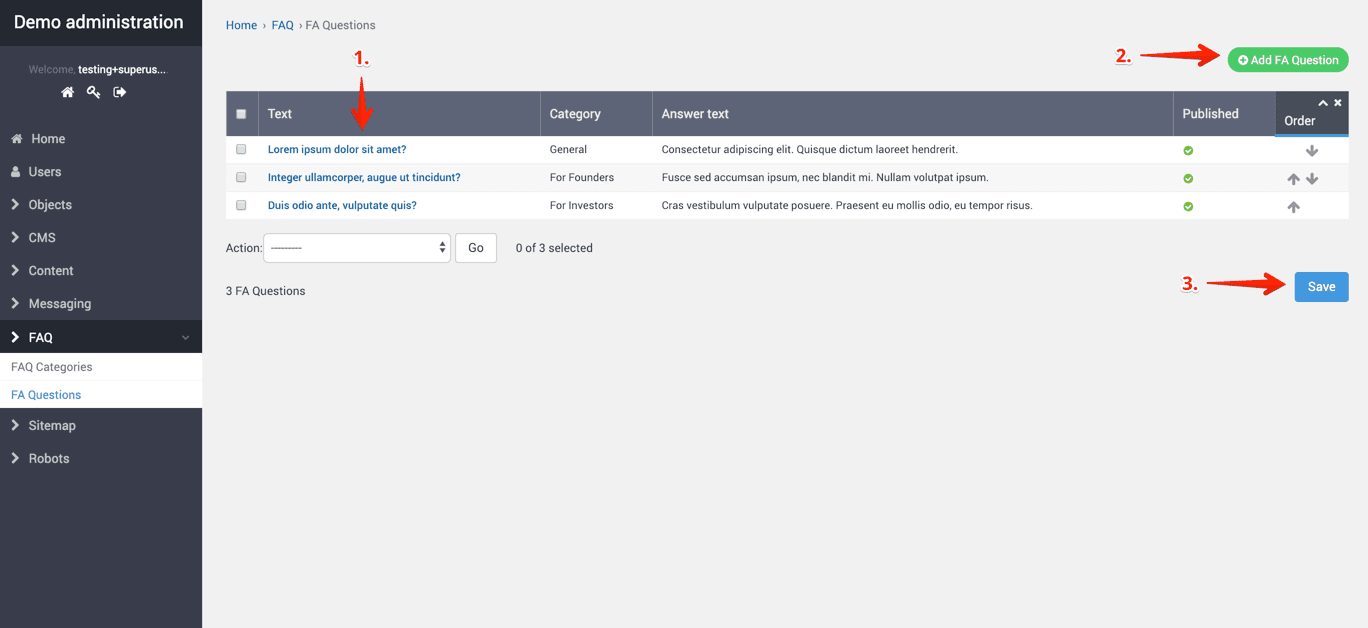
FAQ Questions
- To
editan FAQ Question/Answer click on the link in theTextcolumn of the table. - To
adda new FAQ Question/Answer click theAdd FA Questionbutton. - Don't forget to save if you have reorderd the questions using the arrows in the
Ordercolumn of the table.
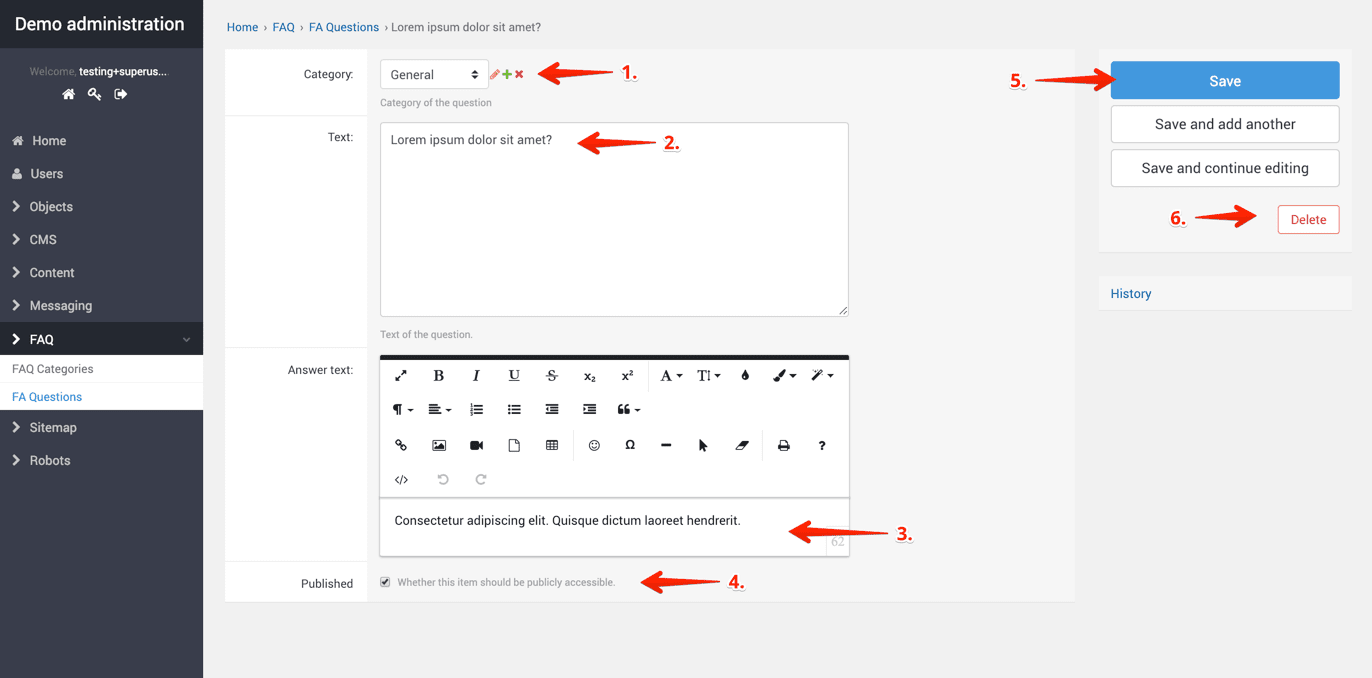
Add FAQ Questions
- Select the
Categoryto which you want to add the FAQ Question/Answer. - Add the FAQ Question to the text field.
- Add the FAQ Answer to the WYSIWG editor. You can style the answer and add images as you see fit following instructions here.
- Set the FAQ Question/Answer to published for it to display on the site.
- Save the FAQ Question/Answer.
- You can delete an individual FAQ Question/Answer if you wish.
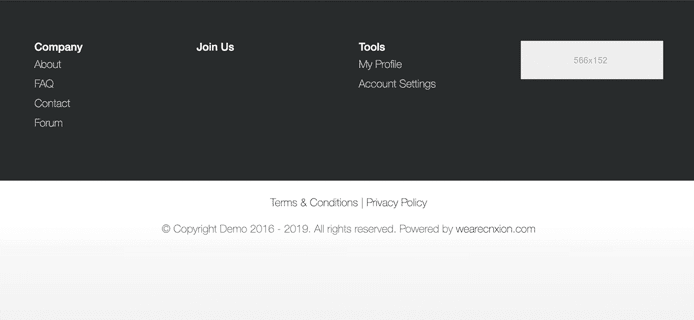
Footer & Copyright Links
Manage footer links & pages from the admin dashboard for terms & conditions, privacy policy & community guidelines.
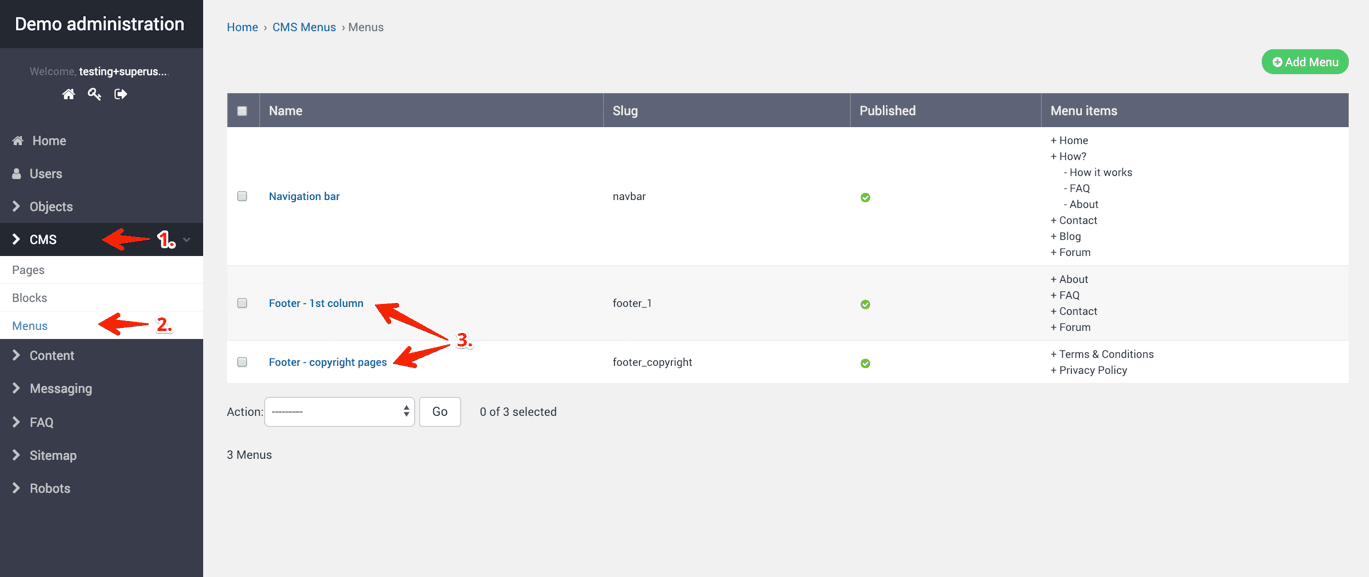
Access Footer & Copyright Menus
- Log in to administrator dashboard.
- Click
CMSmenu item from the left hand sidebar menu. - CLick
Menusmenu item from the left hand sidebar menu. - Select which footer menu you wish to edit (you can see a list of the pages already added to the menus in the
Menu Itemscolumn of the corresponding menu).
Tip
Multiple footer column menus can be added by creating new menus with name Footer - 2nd column and slug footer_2 etc.
Select a Menu to Edit
- Click the
Click here to edit/nest/reorder menu itemslink.

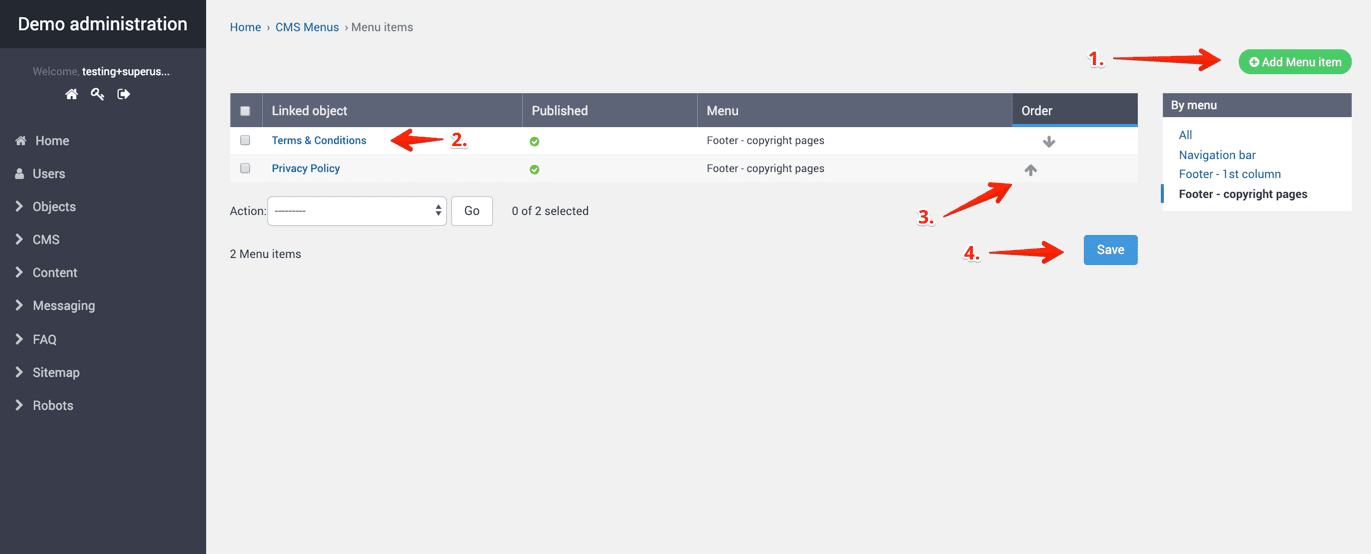
Edit / Nest / Reorder Menu Items
- To add a menu item to the menu click the
Add menu itembutton. - To edit an existing menu item click on the link in the
linked objectcolumn for the menu item you wish to edit. - Reorder the menu items by clicking the arrows in the
ordercolumn. - Make sure to save your changes.
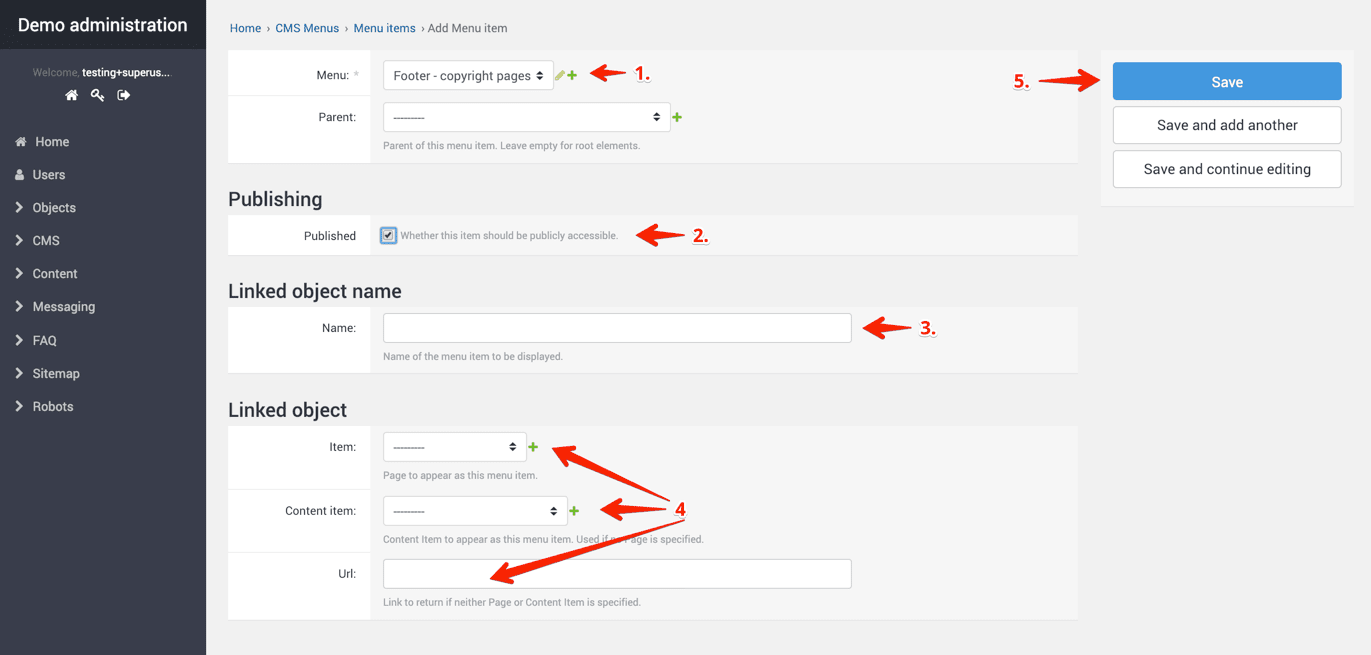
Add Menu Items to a Menu
- Select the menu you wish to add an item to.
- Set the menu item to published so it will display on the live site.
- Add a custom menu item name if you wish to override a name of a content item or use a custom URL.
- Select a linked object where you would like the menu item to link to, it can be an Item (CMS Page) a Content Item or an external page URL.
- Save your changes.
Manage the Sitemap and Robots text files
Generally you should not need to touch these.
Links:
- https://yoursite.com/admin/sitemap/sitemapentry/
- https://yoursite.com/admin/robots/robotsfile/
Note
Please contact support for assistance, documentation to be updated.