Ecommerce
Allow users to setup their own store or customize the checkout process specific for your application.
Overview
The ecommerce feature allows to setup a marketplace using the CNXION platforms. It provides an ability for users to sell their products to other users and buy products from other users. These 2 groups of users are called sellers and customers respectively.
Topics
| Topic | Description |
|---|---|
| Standalone or Peer to Peer | Deploy a standalone store or integrate with existing software tools. |
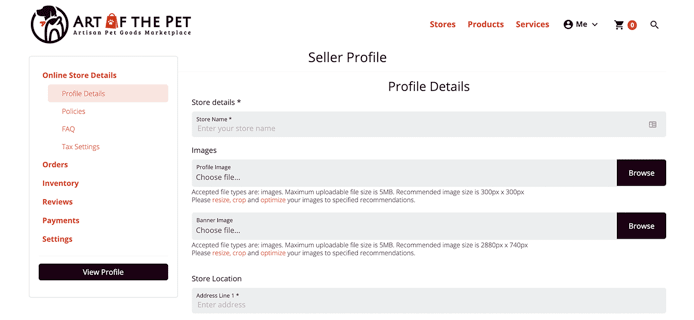
| Custom Stores | Create a shop name, add logo and branding along with a bio, listing and reviews from customers. |
| Products | As an administrator you can help sellers to manage their products and product variations. |
| Shipping | Both Product and Product Variation details pages in the admin interface have a section which allows you to specify shipping information for that product. |
| Tax | Tax calculator module with compliance assistance via Taxjar. |
| Orders | Sellers can view, manage and print orders and packing slips from their dashboard. |
| Payments | Accept credit cards & handle payments with ease. |
| Cart | Multi vendor checkout with the option of split payments to multiple stores in a single transaction. |
| Analytics | Sellers can manage sales and view deatailed customer analytics to improve store turnover. |
Related documentation
- As a developer (restricted)
- As a superuser (restricted)
- As a site administrator (this page)
- As an end user
Please, make sure to read end user documentation in order to get understanding of what the ecommerce feature allows users of your site do. Also it describes some general principles of how various parts of the ecommerce feature work, which may be useful for you as well.
Standalone or Peer to Peer
Deploy a standalone store or integrate with existing software tools.
Note
Please contact support for assistance, documentation to be updated.
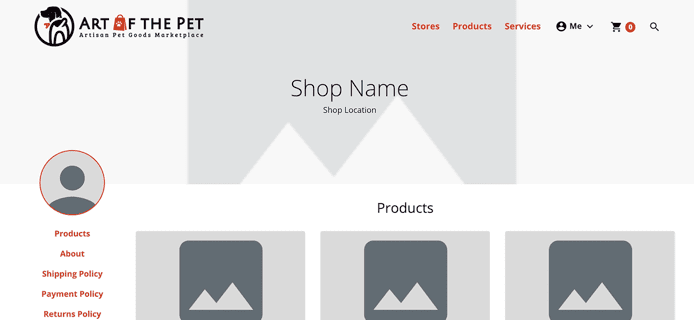
Custom Stores
Create a shop name, add logo and branding along with a bio, listing and reviews from customers.
Note
Please contact support for assistance, documentation to be updated.
Products
As an administrator you can help sellers to manage their products and product
variations. In order to do that log into the /admin/ portion of your site and
navigate to the Ecommerce > Products or Ecommerce > Product Variations
sections. The first one allows you to create, edit and delete products, while
the other one allows to do the same actions for product variations.
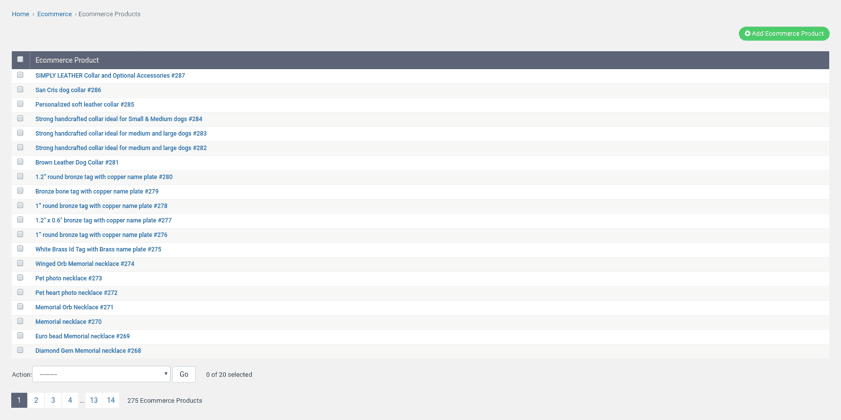
In order to create a new product click the Add Ecommerce Product button. This
will lead you to a page that allows you to provide information about this
product. Please, note that a default product variation is not created
automatically for products created using the admin interace. So, you will have
to create all product variations manually.
In order to edit a product click a title of a product you want to change. This will lead you to a page that allows you to change information about this product.
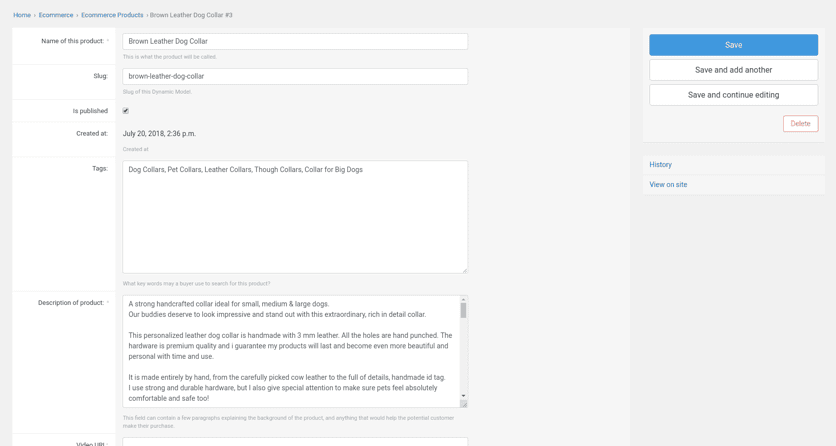
Please, note that each product has a checkbox called Is published. This
checkbox has to be checked in order this item to be viewable in the site.
The Data field contains additional information about the product. This
information is specific to your shop. Please, contact our specialist to get
a complete list of fields and possible values for them.
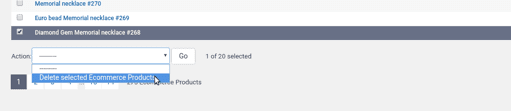
In order to delete a product you have to select it in a list of products using
a checkbox on the left hand side of its name and select the
Delete selected Ecommerce Products action from the Action menu at the bottom
of the page.
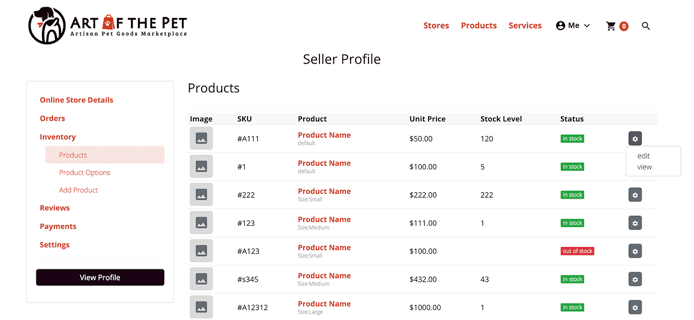
Inventory & Fulfillment
Improved product list view inside seller profile.
Note
Please contact support for assistance, documentation to be updated.
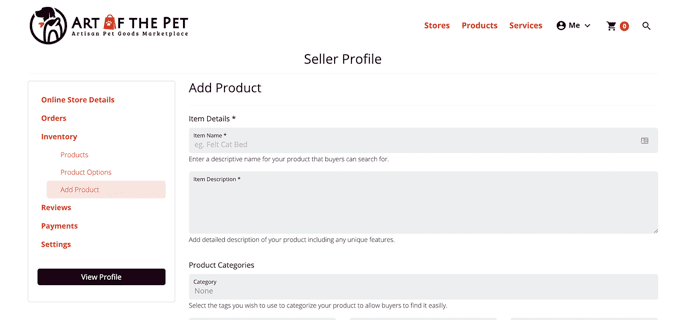
Custom Products
Add inventory with feature images, galleries, reviews etc.
Note
Please contact support for assistance, documentation to be updated.
Product Variations
Add product variations for color, size, material etc with inherited or individual pricing and shipping settings.
Note
Please contact support for assistance, documentation to be updated.

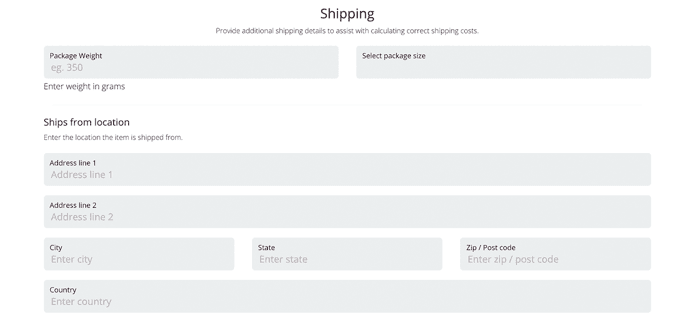
Shipping
Both Product and Product Variation details pages in the admin interface have
a section which allows you to specify shipping information for that product. In
general these pages work the same as a frontend version used by sellers.
However, there are some rules you have to follow to keep things working the way
they should.
The Destination field should contain a comma-separated list of county codes or
a special word "everywhere" in case you want to ship this product everywhere.
Please, contact our specialist to get a complete list of available country
codes.
There is a relation between shipping packages you select and a shipping package size. If you select a custom package than you have to enter data for the shipping package size as well. At the moment, length is measured in centimeters and weight is measured in grams.
While working with shipping rates, please, make sure that you select correct
shipping services. So that a selected shipping provider really provide them.
Rate first item and Rate additional items fields are required only if you
select a fixed rate type.
Dynamic Shipping Calculations
Calculate shipping for multiple products based on product size, weight and location.
Note
Please contact support for assistance, documentation to be updated.
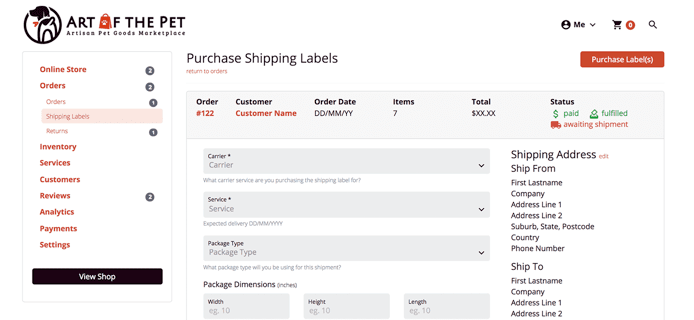
Shipping Labels
Sellers can purchase and print shipping labels directly through the platform.
Note
Please contact support for assistance, documentation to be updated.
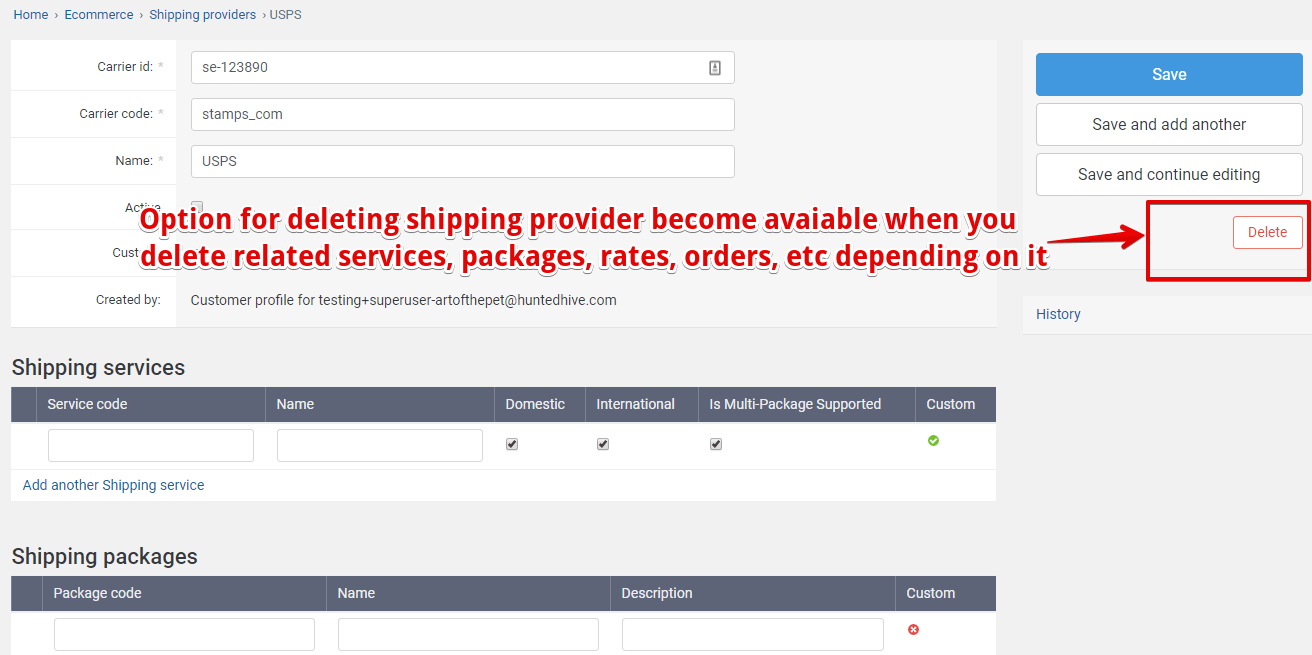
Managing Carrier Services
As a administrator you are able to add shipping carriers and services:
- Login to administration panel as a superuser.
- Go to
Ecommerce > Shipping Providersin left hand sidebar menu. -
Click on
Add shipping provider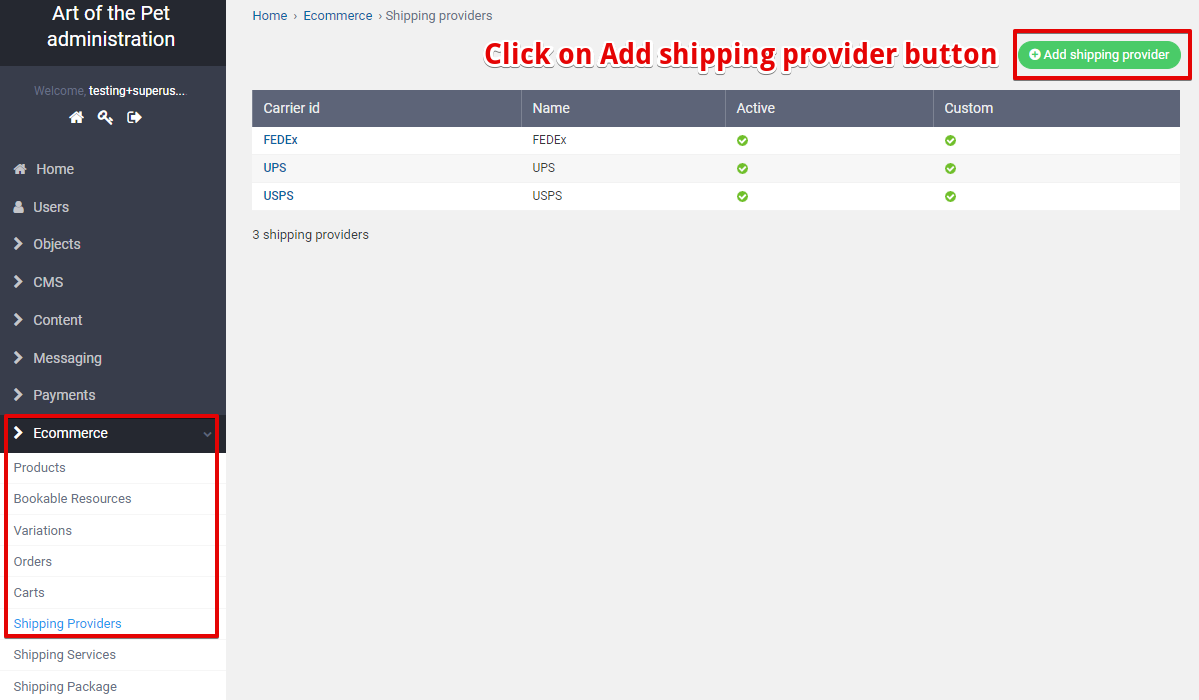
-
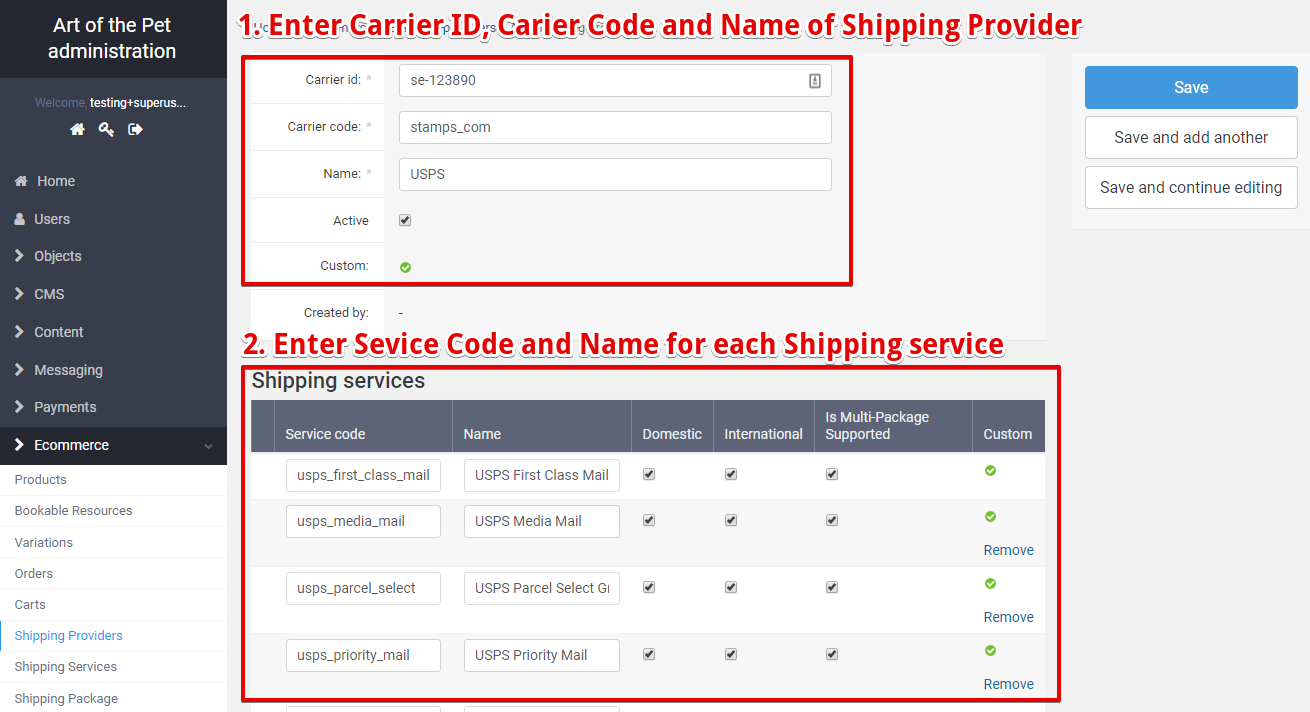
Enter
Carrier ID,Carrier Codeand Name ofShipping Provider.Carrier ID: a string that uniquely identifies the carrier. It is provided by Shipengine documentation (https://docs.shipengine.com/docs/list-carrier-services)Carrier Code: a unique carrier code. It is provided by Shipengine documentation (https://docs.shipengine.com/docs/list-carrier-services)Name: name of theShipping Provider. This will be the shipping provider name displayed within the interface for sellers and customers to select.Active: select the checkbox to make the carrier and related services active and selectable within the platform.
-
Enter
Service CodeandNamefor eachShipping service.Service Code: the carrier service used to ship the package, such as fedex_ground, usps_first_class_mail, flat_rate_envelope, etc. It is provided by the Shipengine documentation (https://docs.shipengine.com/docs/list-carrier-services)Name: the name ofShipping service. This will be the shipping service name displayed within the interface for sellers and customers to select.
-
You can also choose several options for each shipping service:
Domestic,International,Is Multi-Package Supported.Domestic: this option means that a service will be able to do domestic shipping. It is not currently utilised within the platform and reserved for future use.International: this option means that a service will be able to do international shipping. It is not currently utilised within the platform and reserved for future use.Is Multi-Package Supported: this option means that this service will be able to perform shipping of several packages as one shipment. It is not currently utilised within the platform and reserved for future use.
-
Click on Save button.
Note
You cannot delete a provider if it has some services, packages, rates, orders, etc depending on it. First delete related services, packages, rates, orders. Then deleting shipping provider should become available.
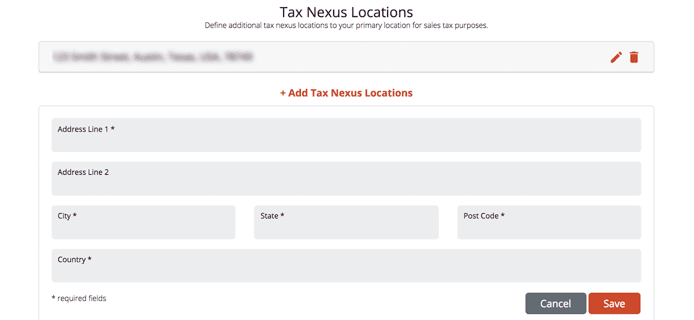
Tax
Tax Calculation Module
Tax calculator module with compliance assistance via Taxjar.
Note
Please contact support for assistance, documentation to be updated.
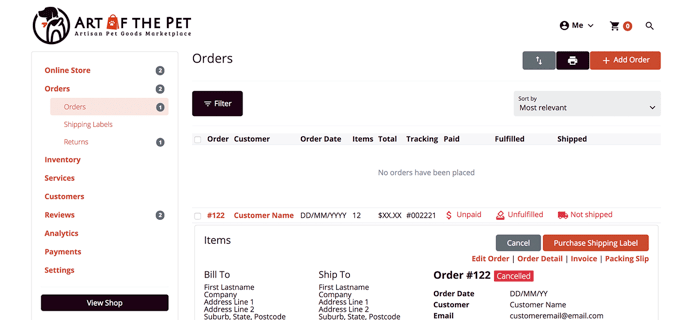
Orders
Sellers can view, manage and print orders and packing slips from their dashboard.
Note
Please contact support for assistance, documentation to be updated.
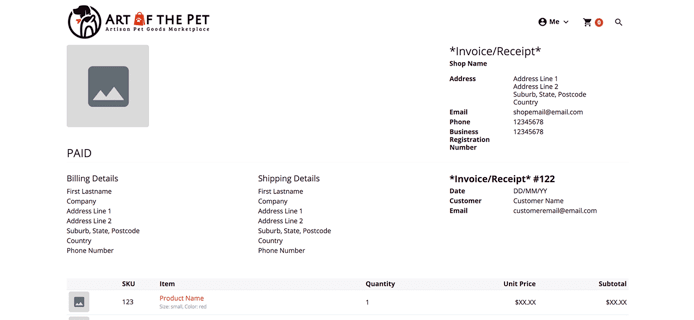
Invoicing
Buyers and sellers can view and print invoices from their seller dashboard.
Note
Please contact support for assistance, documentation to be updated.
Refunds
As a seller, if you are using the Stripe Payment Gateway, then you can use the Stripe Dashboard to refund the charge to the customers. To refund a charge via the Dashboard:
-
Find the charge to be refunded in the
Paymentsoverview page. -
Click the ... icon to the right of the charge. From the resulting menu, select
Refund payment.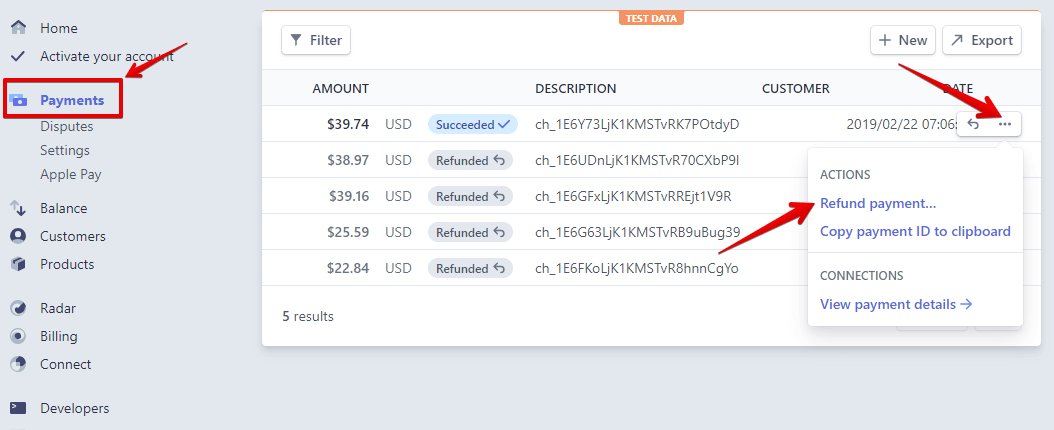
-
By default, you will issue a full refund. For a partial refund, enter a different amount to be refunded.
-
Select a reason for the refund. If you select
Other, you must provide an explanatory note that is attached to the refund.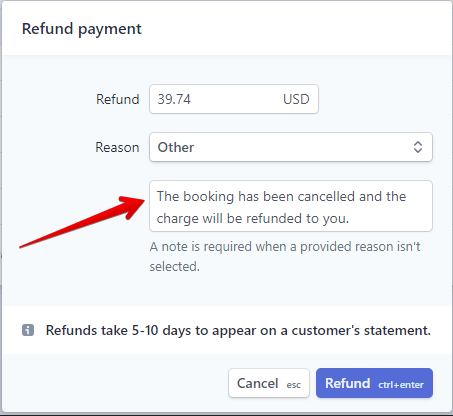
-
Click
Refund.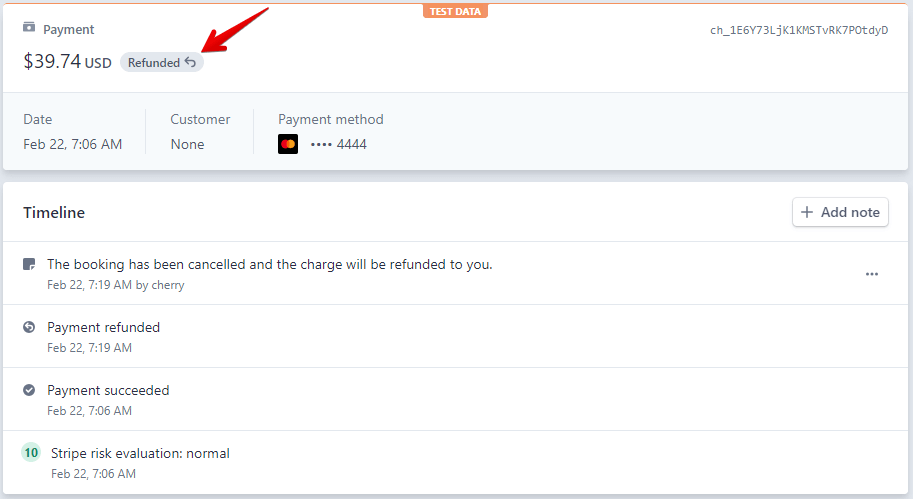
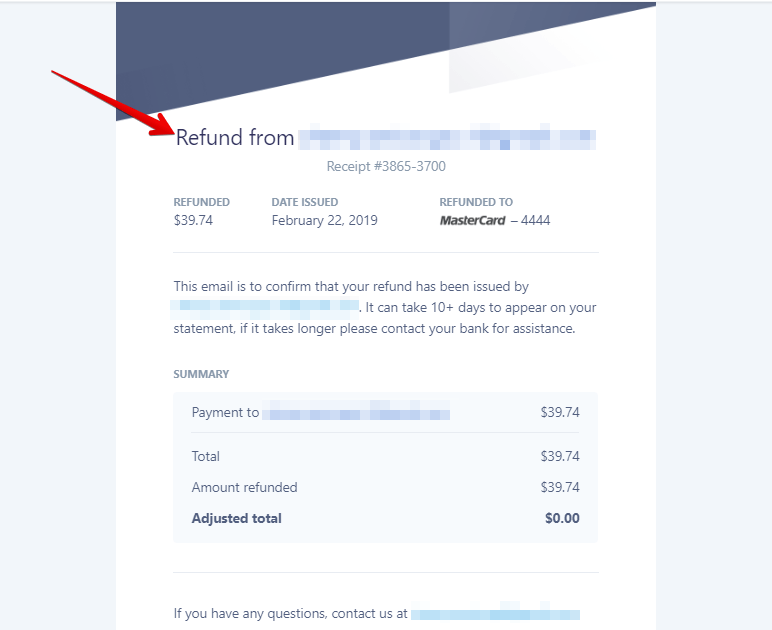
You can also manually send an email to notify the customer about this refunded charge.
-
In the payment details page, click the
Send receiptbutton.
-
Enter the customer email then click
Send. You can also enter multiple email addresses separated with commas.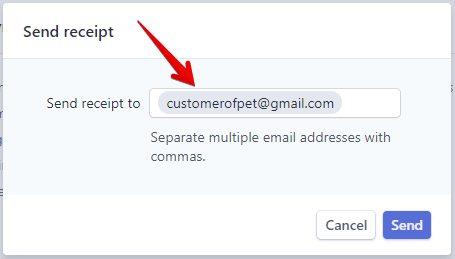
-
An email will be sent to the customer to confirm the refund.
Tracking Numbers
- Log in to your seller account and navigate to your
Profile. - Click on the
Orderstab in the left hand sidebar menu. - From the orders table click the order number for the order you wish to add a tracking number to.
- Click the
Edit Order Itemsbutton at the top of the order detail page. - Click the
editoption for the order item you wish to add a tracking number to. - Add a tracking number to the
Tracking numberfield. Saveyour changes and the buyer will see the tracking number when they access their order detail page.
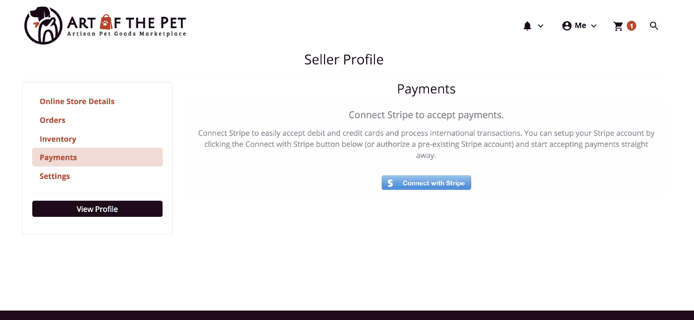
Payments
Accept Credit Cards
Accept credit cards & handle payments with ease.
Note
Please contact support for assistance, documentation to be updated.
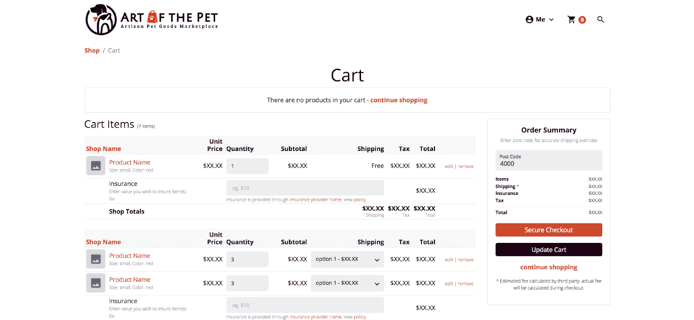
Cart
Multi vendor checkout with the option of split payments to multiple stores in a single transaction.
Note
Please contact support for assistance, documentation to be updated.
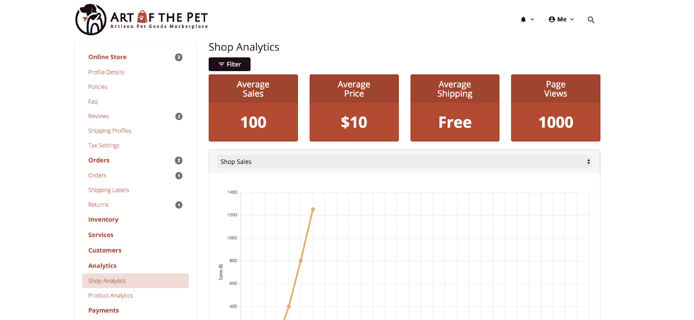
Analytics
Sellers can manage sales and view deatailed customer analytics to improve store turnover.
Note
Please contact support for assistance, documentation to be updated.
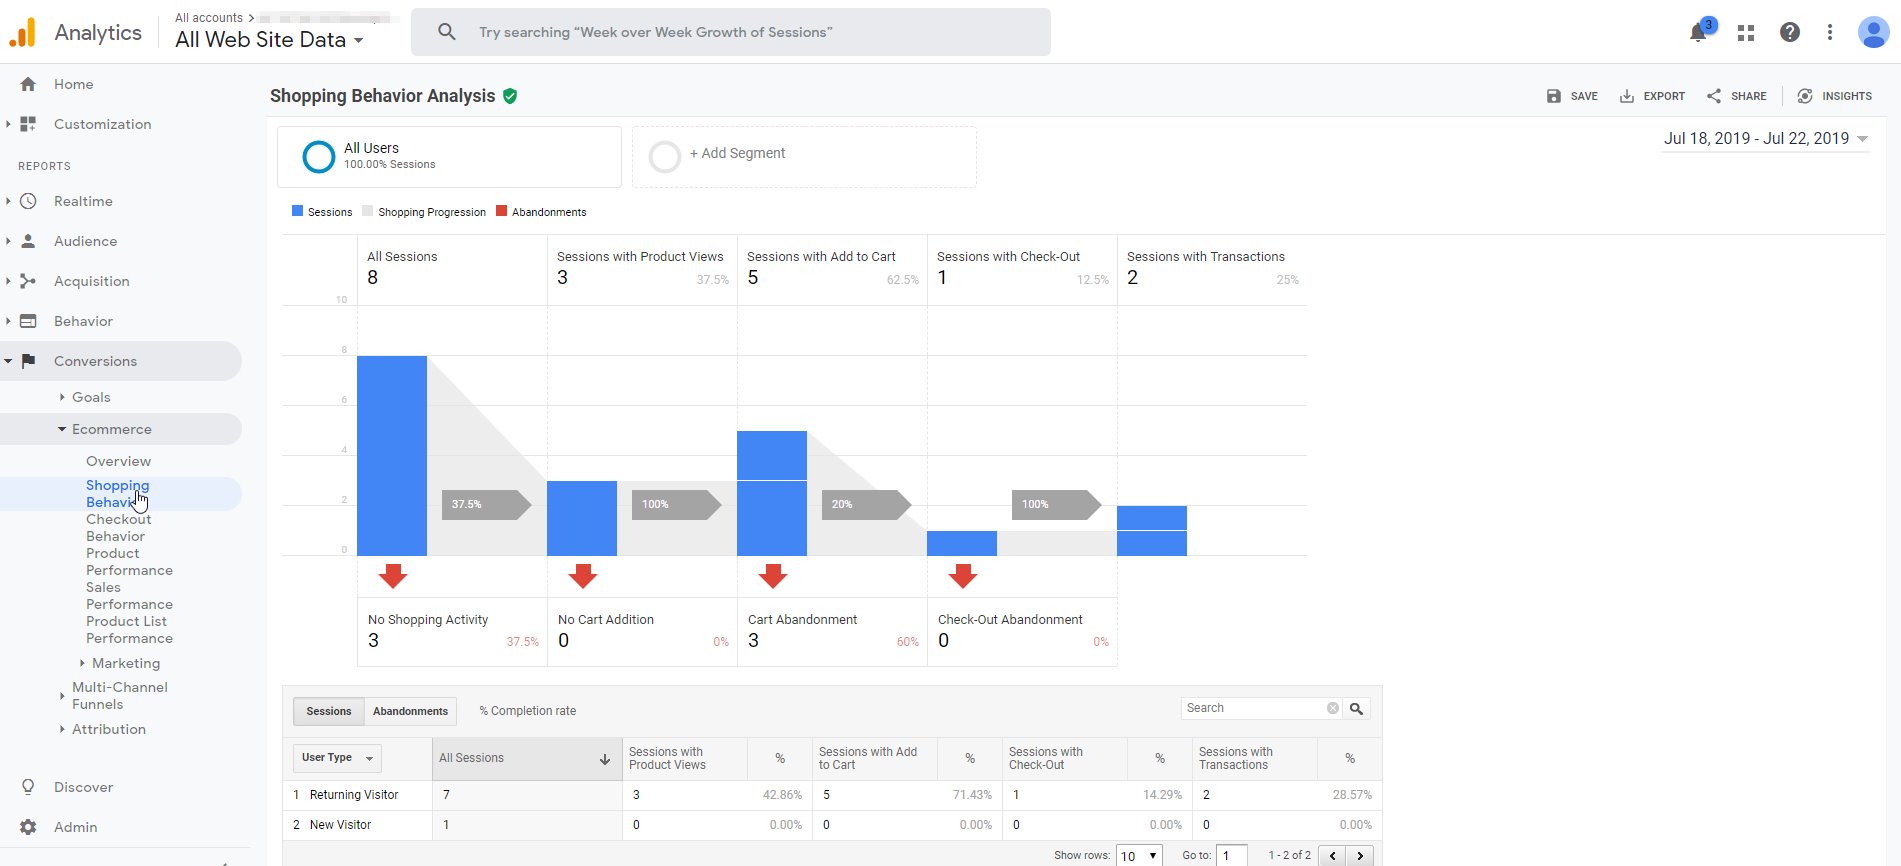
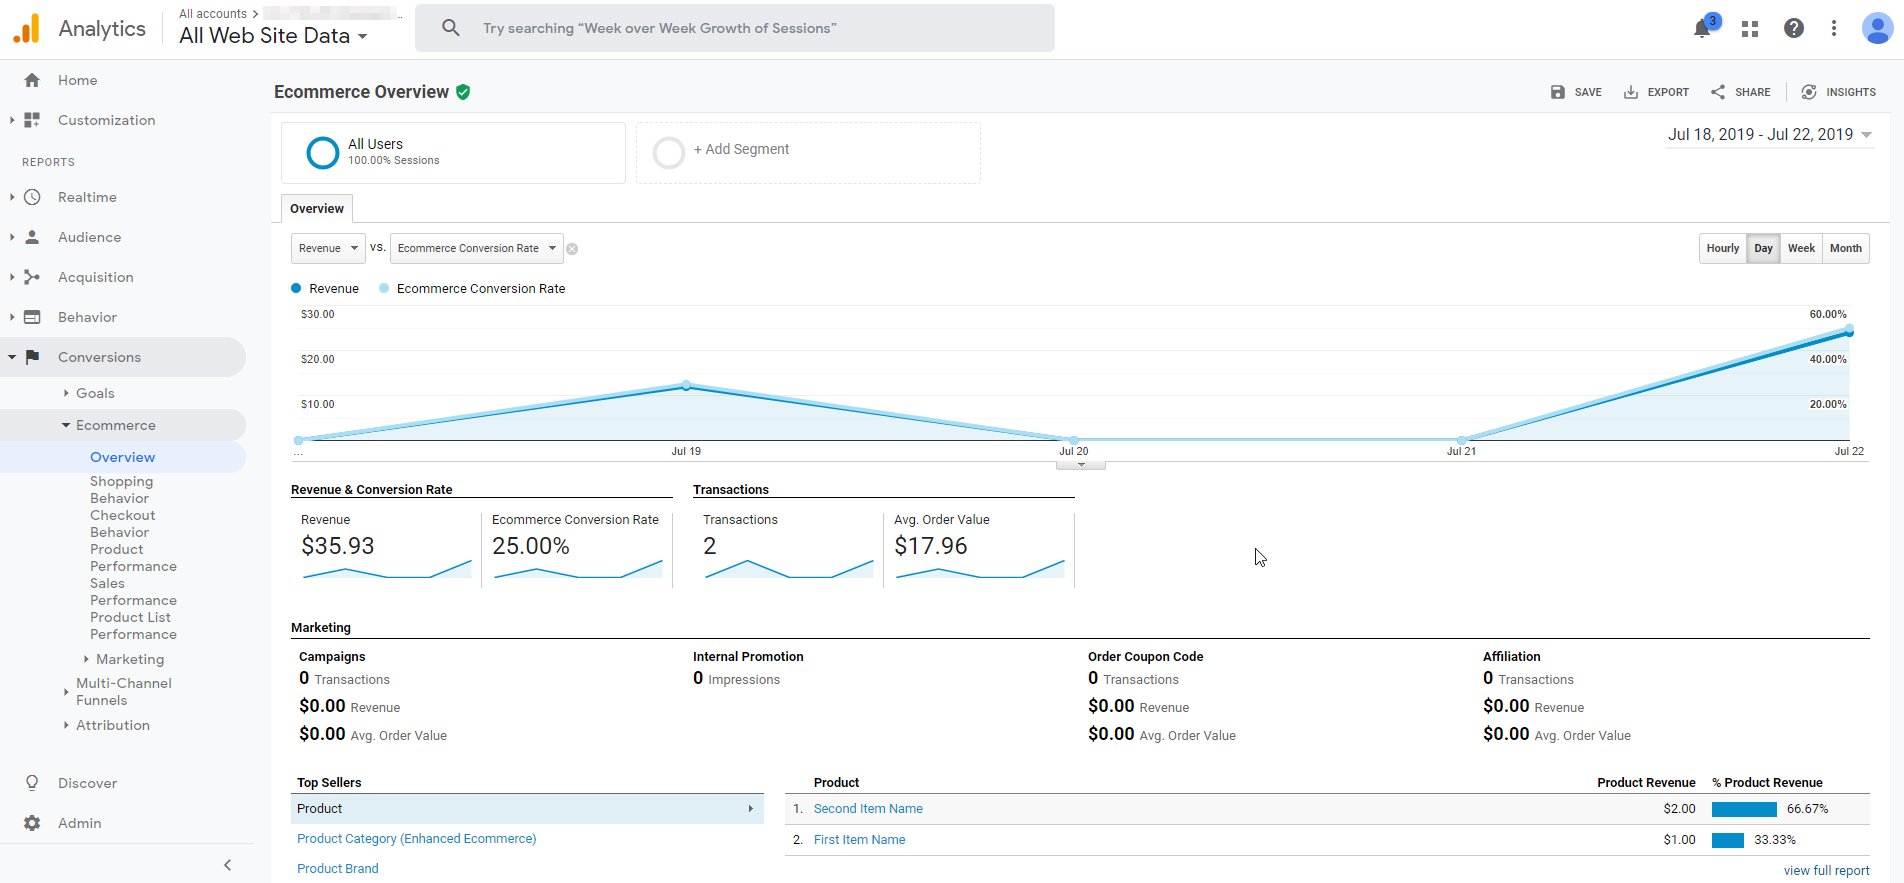
Google Analytics Ecommerce Integration
Google Analytics Enhanced Ecommerce Integration is available in CNXION platform to help you to analyse shopping behaviour in the marketplace.
We collect information about following events:
- general page view
- viewing a product (with all its details like name, price, seller etc.)
- adding product to a cart
- all checkout steps
- successfull purchase
That makes possible to see/measure/monitor crucial data/behaviour like:
- product performance
- sellers performance
- checkout behaviour
- shopping behaviour
- revenue
- conversion rate
- avg. order value
- and many more statistics
Examples:
- It is possible to see base ecommerce details:
- Product performance, eg. most selling product:
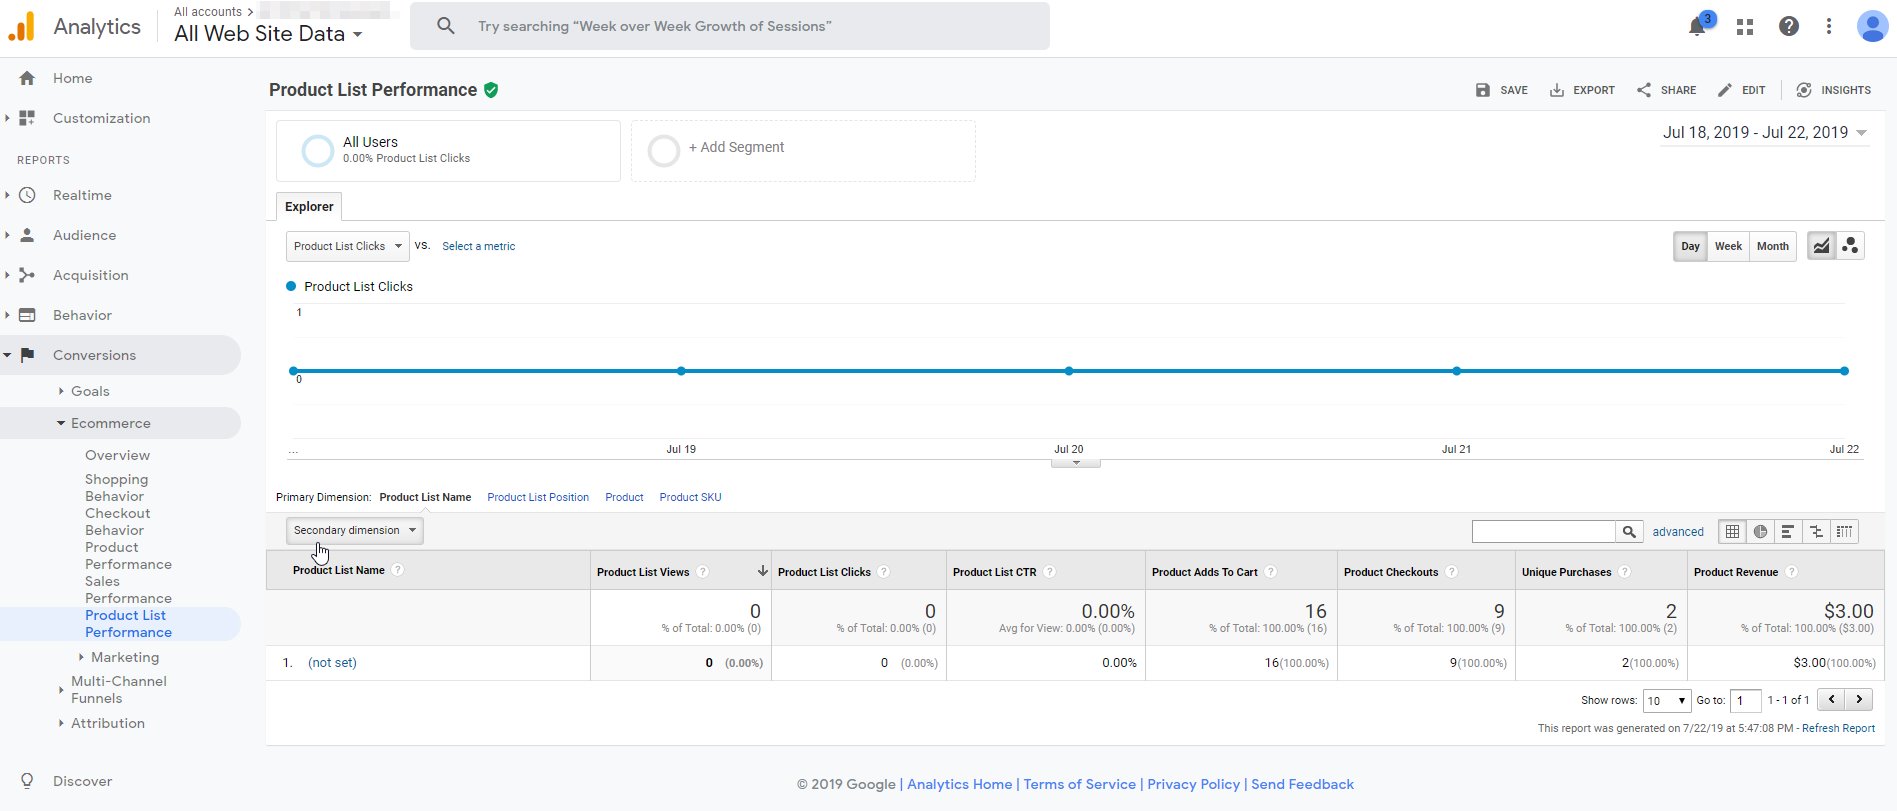
- Product list performance:
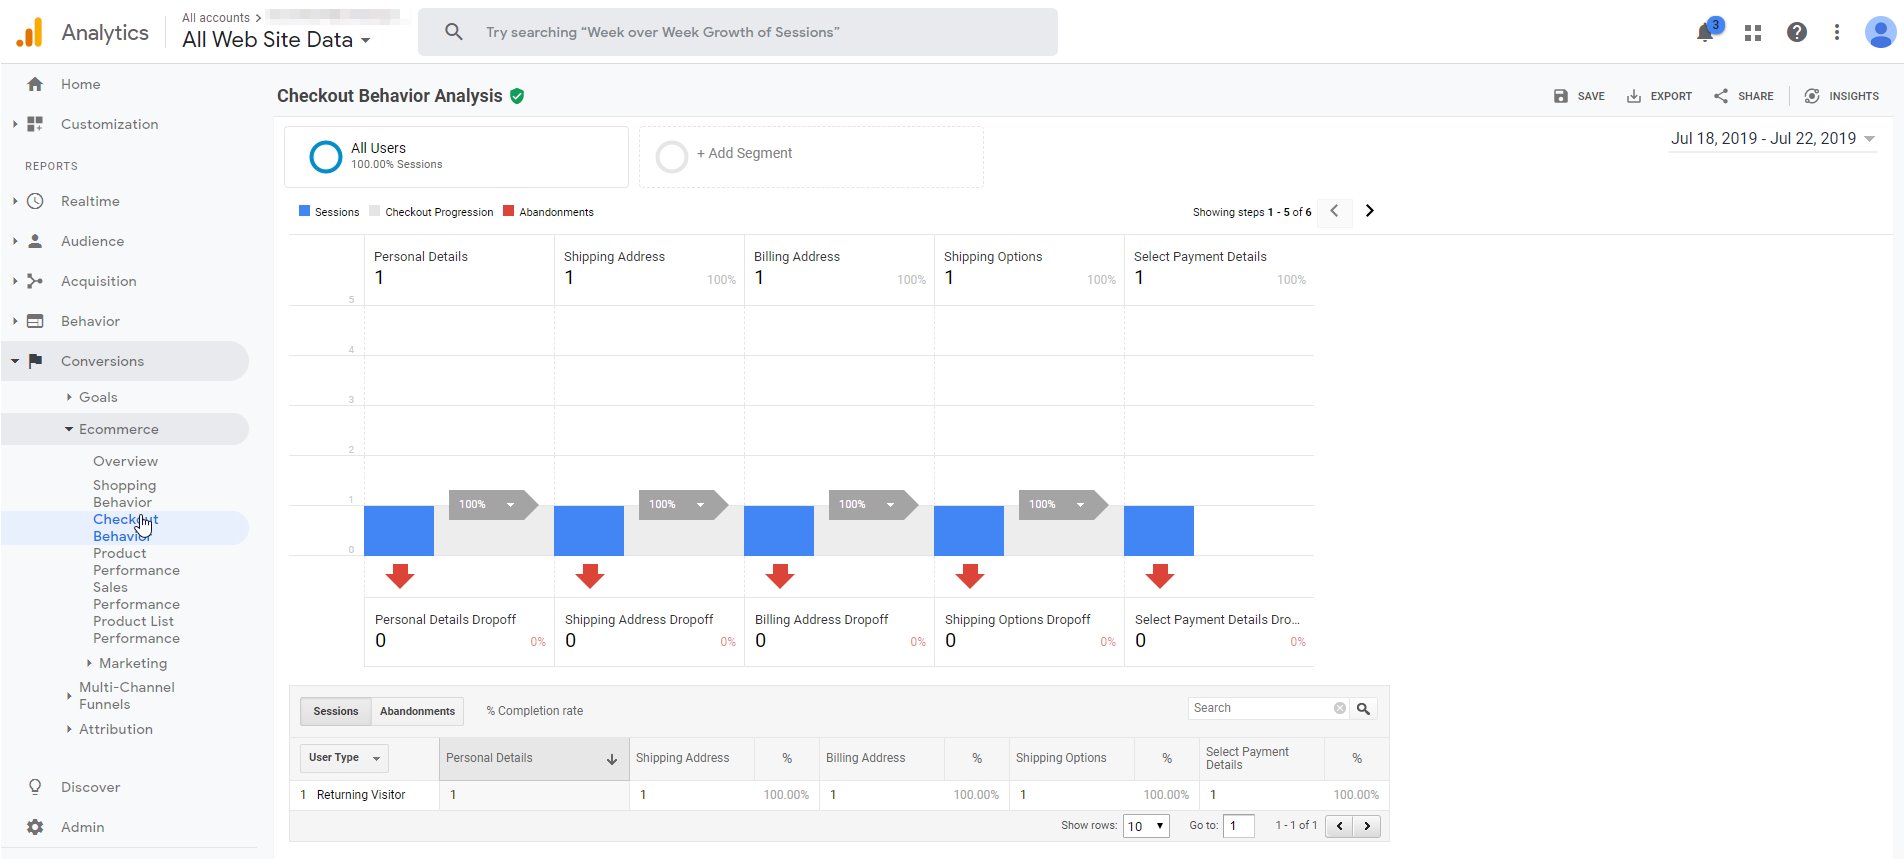
- Checkout Behaviour Analysis:
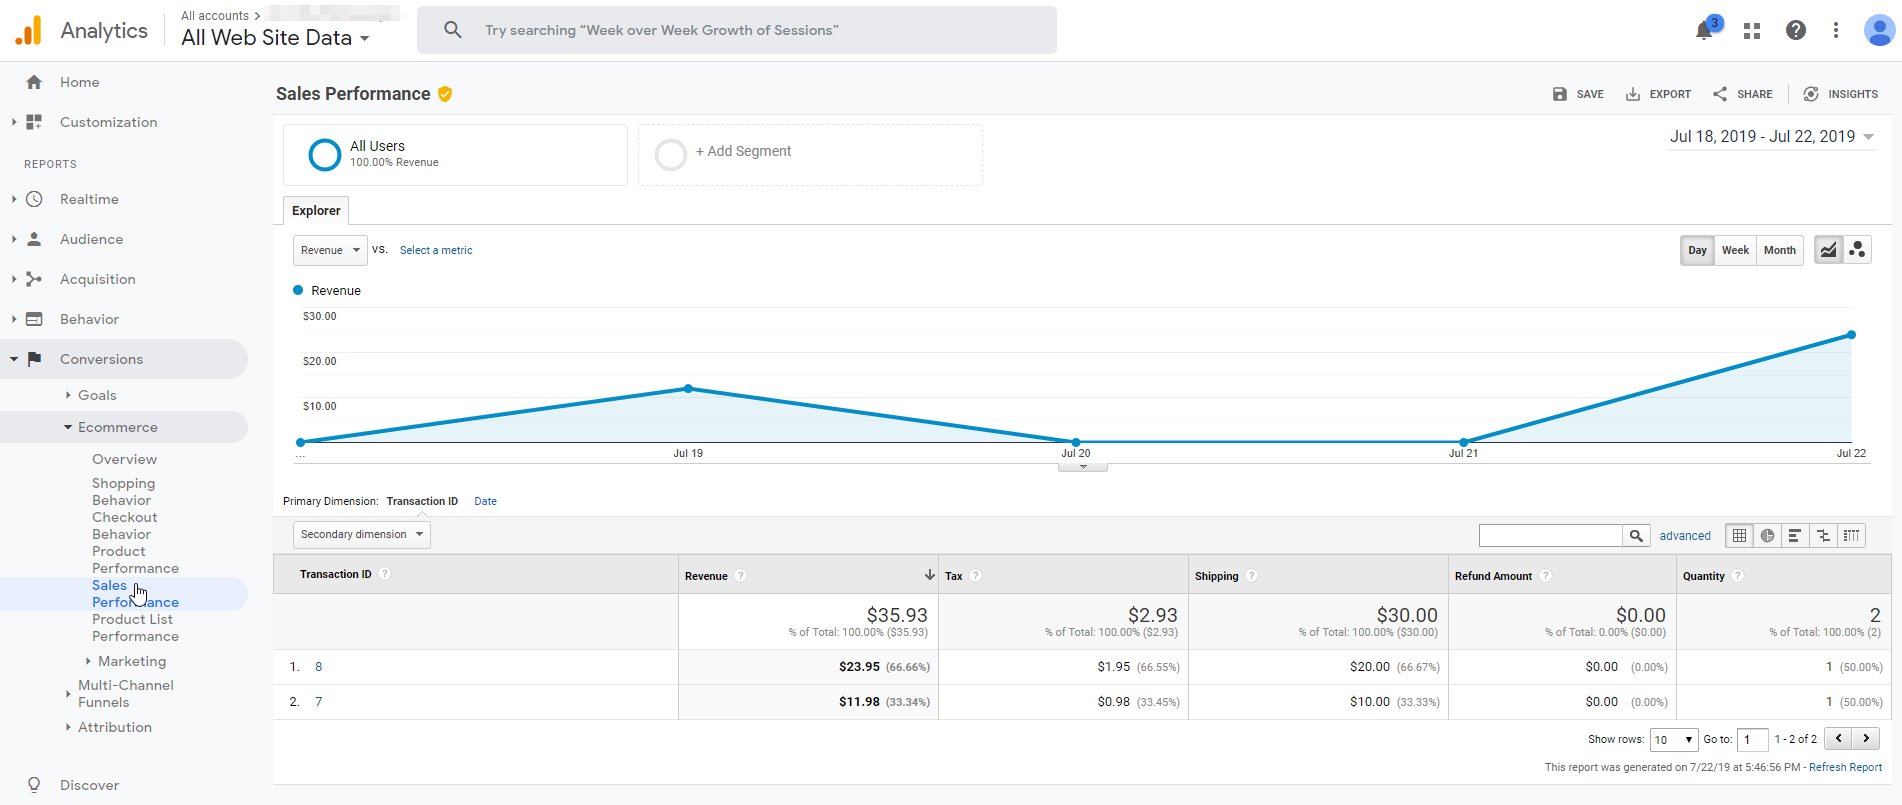
- Sales Performance:
- Shopping Behaviour Analysis: